Building a CI/CD Pipeline to Deploy Mule Applications in CloudHub 2.0 with Custom Notifications
Introduction
In today's fast-paced development environment, Continuous Integration and Continuous Deployment (CI/CD) play a pivotal role in automating the deployment of applications. When deploying Mule applications on CloudHub 2.0, automation not only enhances efficiency but also reduces the potential for errors. This post will walk you through creating a CI/CD pipeline using GitHub Actions and setting up custom email notifications to improve visibility on the build and deploy status.
What is CI/CD?
CI/CD is a methodology used to automate software development, testing, and deployment, helping teams release software faster and more reliably.
- Continuous Integration (CI): Automatically tests and integrates code changes into a shared repository, ensuring the code is always in a deployable state.
- Continuous Deployment (CD): Extends CI by automatically deploying the tested code to production environments, reducing manual effort and increasing the speed of software delivery.
Prerequisites
- GitHub repository with Mule application source code.
- Anypoint Platform Account.
- CI/CD Pipeline in GitHub Actions.
- Email service setup for notifications (e.g., Gmail, SMTP).
Step-by-Step Guide to Setting up CI/CD Pipeline
1. Create Mule Application
Step 1: Open Anypoint Studio: Launch Anypoint Studio, the official IDE for MuleSoft development.
Step 2: Create a New Project: Navigate to File > New > Mule Project, then give your project a name.
Step 3: Design Your Flow: Use the Mule palette to drag and drop connectors such as HTTP Listener and Transform Message to create your integration flow.
Step 4: Configure Connectors: Set up the necessary configurations, such as HTTP Listener ports, connection parameters, and message transformation logic.
Step 5: Run and Test: Click Run in Anypoint Studio to test your flow locally.
2. Set up Maven Plugin for Deployment
The Mule Maven Plugin integrates MuleSoft applications with Maven, allowing you to build, package, test, and deploy Mule applications in a standardized way. It automates the process of packaging your Mule project and deploying it to environments like CloudHub, On-Prem, or Runtime Manager from the command line or through a CI/CD pipeline.
To get started:
- Open Anypoint Studio and locate the
pom.xmlfile of your Mule project. - Find the XML key
mule.maven.plugin.versionand update it to the latest version available on the MuleSoft Release Page. - For deploying applications to CloudHub 2.0, you need to meet specific prerequisites and configure your deployment strategy in the
pom.xml.
Step 1: Add CloudHub 2.0 Configuration Plugin in pom.xml
Add the necessary CloudHub configuration plugin to your pom.xml file to deploy your application to the CloudHub 2.0 environment.
<cloudhub2Deployment>
    <uri>https://anypoint.mulesoft.com</uri>
    <provider>MC</provider>
    <environment>${environment}</environment>
    <target>${target}</target>
    <muleVersion>4.7.0</muleVersion>
    <server>Repository</server>
    <applicationName>wave-integration-cicd</applicationName>
    <replicas>1</replicas>
    <vCores>0.1</vCores>
    <properties>
        <env>${en}</env>
    </properties>
    <secureProperties>
        <key>${secure_key}</key>
    </secureProperties>
    <skipDeploymentVerification>true</skipDeploymentVerification>
    <deploymentSettings/>
</cloudhub2Deployment>
CloudHub plugin
The <skipDeploymentVerification>true</skipDeploymentVerification> setting in the Maven plugin speeds up deployments by skipping post-deployment verification. This means the pipeline won’t wait to confirm if the application is running correctly. While useful for faster deployments in non-production environments, it's recommended to keep verification enabled in production to ensure successful deployment.
Step 2: Add the Distribution Management in the Pom.xml (helps to publish the application jar file to Exchange). Ensure that your pom.xml includes the necessary distribution management section for deploying to Anypoint Exchange and other environments.
<distributionManagement>
    <repository>
        <id>Repository</id>
        <name>Corporate Repository</name>
        <url>https://maven.anypoint.mulesoft.com/api/v3/organizations/********-****-****-****/maven</url>
        <layout>default</layout>
    </repository>
</distributionManagement>
distributionManagement
Step 3: Add the Repository inside the <repositories> section.
In the pom.xml file of your Mule project, add the following repository configuration inside the <repositories> section:
<repositories>
    <repository>
        <id>Repository</id>
        <name>Exchange2 Repository</name>
        <url>https://maven.anypoint.mulesoft.com/api/v3/organizations/********-****-****-****/maven</url>
        <layout>default</layout>
    </repository>
</repositories>
repository
3. Set up Source Control and GitHub Actions Workflow
Step 1: Sign in to GitHub: Log in to your GitHub account at github.com and create a new repository for your Mule project.
- In your repository, create a folder named
.github, then inside it, create another folder calledworkflows. - Create a new file in the
workflowsfolder namedbuild.yml. - Add the following pipeline code to this
build.ymlfile:
Create the GitHub Actions workflow:
name: Build and Deploy to CloudHub 2.0
on:
  push:
    branches: dev

jobs:
  deploy:
    runs-on: windows-latest
    steps:
    - name: Checkout code
      uses: actions/checkout@v4

    - name: Set up Java
      uses: actions/setup-java@v4
      with:
        distribution: "temurin"
        java-version: '21'

    - name: Deploy to Exchange
      run: mvn deploy -s settings.xml

    - name: Deploy to CloudHub
      run: |
        mvn deploy -DmuleDeploy -Denvironment="${{vars.MULE_ENV}}" -Dsecure_key="${{secrets.MULE_KEY}}" -Dtarget="${{vars.MULE_TARGET}}" --settings settings.xml

    - name: Send Email Notification
      if: ${{ always() }}
      uses: dawidd6/action-send-mail@v3
      with:
        server_address: smtp.gmail.com
        server_port: 465
        username: ${{secrets.MAIL_ADDRESS}}
        password: ${{secrets.MAIL_PASSWORD}}
        subject: ${{github.job}} job of ${{github.repository}} has ${{job.status}}
        body: ${{github.job}} in workflow ${{github.workflow}} of ${{github.repository}} has ${{job.status}}
        to: mail123@gmail.com, mail456@gmail.com
        from: ${{secrets.MAIL_ADDRESS}}
.github/workflows/build.yml
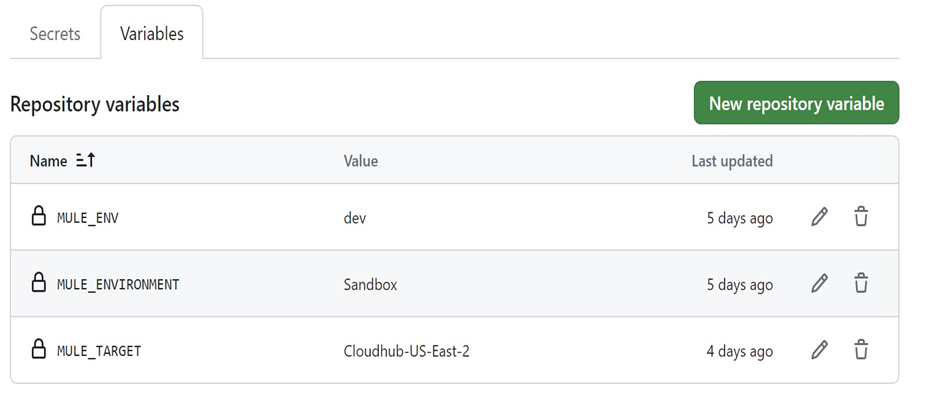
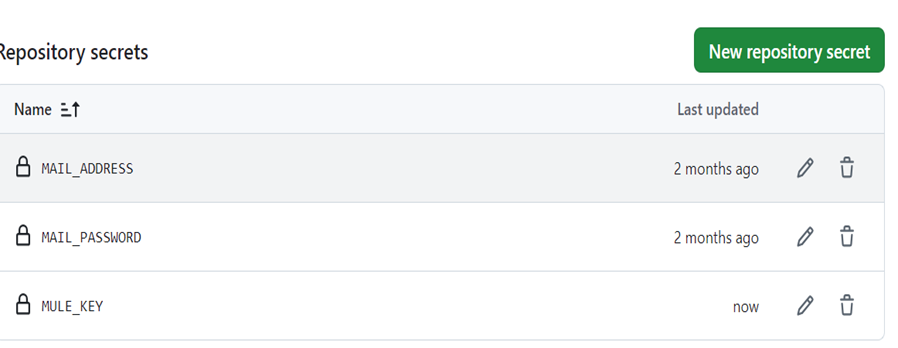
Step 2: Set up GitHub Secrets:
- Navigate to the Settings tab of your repository.
- Under Secrets and Variables, click Actions.
- Add the necessary secret values, such as your Mule environment variables, API keys, and SMTP credentials.
Step 3: Publish a JAR File to Anypoint Exchange and Deploy to Runtime Manager
To publish a JAR file to Anypoint Exchange and deploy it to Runtime Manager, ensure that you have added the credentials to access your Anypoint Platform. Create Connected Apps Credentials to maintain control and limit permissions instead of giving full access to the Anypoint Platform.
Step 4: Add the Settings File
Add a new file to the project and name it settings.xml. Paste the Connected Apps Credentials into this file.
<?xml version="1.0" encoding="UTF-8" standalone="no"?>
<settings>
    <servers>
        <server>
            <id>anypoint-exchange-v3</id>
            <username>~~~Client~~~</username>
            <password>client-id~?~client-secret</password>
        </server>
    </servers>
</settings>
Settings.xml
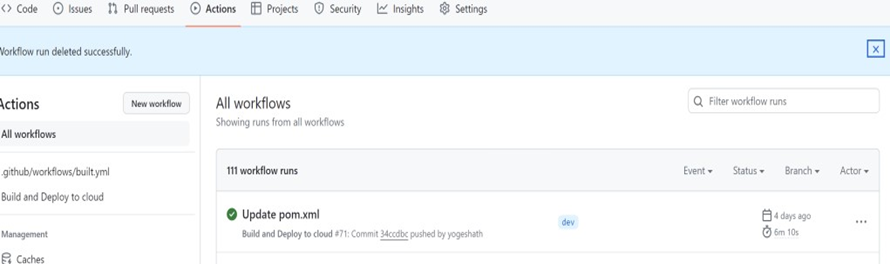
Step 7: Now Go to Actions and you'll see runs from all workflows
4. Custom Email Notifications
The custom email notification setup in your CI/CD workflow with GitHub Actions ensures that users receive timely notifications regarding the success or failure of deployments. By default, GitHub sends notifications when the pipeline triggers; however, this custom setup allows for more personalized notifications. You can utilize an email template from the GitHub Marketplace to streamline the notification process.
Configuration Steps:
- Add Email Service Credentials: Ensure that you add your email service credentials to the repository's secrets and variables for secure access.
- Customize Your Message: Create your custom message content that will be included in the email notifications.
- Send Notifications: Specify any email address to which you want to send the notifications, allowing for flexible communication.
This setup triggers an email via SMTP, whether the deployment succeeds or fails, ensuring that you and your team are always informed.
5. Monitoring the Workflow
Once you've set up your pipeline:
- Push your changes to your branch.
- Go to the Actions tab in your GitHub repository to monitor the workflow execution.
- On every code push, the pipeline will:
- Test and build the Mule application.
- Deploy it to Anypoint Exchange and CloudHub 2.0.
- Send an email notification regarding the status of the build.
Conclusion
Setting up a CI/CD pipeline with GitHub Actions for MuleSoft applications simplifies the process of automated testing, building, and deployment. With the addition of custom notifications, team members can easily stay informed about the status of each deployment. This approach ensures faster, more reliable deployments, reducing manual intervention and allowing your team to focus on developing robust integration solutions.