Connecting Shopify To MuleSoft For Seamless Data Exchange


Introduction:
In the ever-evolving realm of e-commerce, businesses are continually in pursuit of efficient ways to synchronize and optimize their online operations. The integration of your Shopify online store with MuleSoft presents a powerful solution, marrying the prowess of Shopify's e-commerce capabilities and MuleSoft's integration expertise. This alliance forms a digital bridge, facilitating the smooth exchange of data and processes, ultimately enhancing your e-commerce efficiency and enabling your online store to deliver a more seamless and responsive customer experience. Here, we'll explore this integration's benefits and functionalities, showcasing real-world applications that underscore its transformative impact on e-commerce operations in the rapidly changing digital landscape.
Certainly, here are eight key steps for connecting your Shopify online store to MuleSoft for seamless data exchange:
- Data Mapping and Integration Planning: Begin by mapping the data you want to exchange between Shopify and your other systems. Create an integration plan that outlines your objectives and requirements.
- Selecting the Right MuleSoft Connectors: Choose the appropriate MuleSoft connectors that support Shopify integration. These connectors will allow you to interact with Shopify's API.
- Setting Up API Authentication: Configure secure API authentication methods, such as API keys or OAuth, to ensure a safe connection between Shopify and MuleSoft.
- Order Processing Integration: Design a workflow for order processing that transfers order information from Shopify to your back-end systems, such as an ERP or inventory management software.
- Customer Data Synchronization: Establish processes to synchronize customer data between Shopify and your CRM or customer database. This ensures consistency and accurate customer information.
- Inventory Management Automation: Implement automation for inventory management, ensuring that stock levels are updated in real-time across your systems to prevent over- or understocking.
- Payment and Financial Data Integration: Set up secure data transfer for payments, refunds, and financial information between Shopify and your accounting or financial systems.
- Monitoring and Optimization: Continuously monitor the integration for any issues, bottlenecks, or opportunities for improvement. Optimize your integration to ensure it operates efficiently and effectively.
By following these eight steps, you can establish a robust connection between your Shopify online store and MuleSoft, facilitating seamless data exchange and automation to enhance your e-commerce operations.
Certainly, here are potential use case headings for connecting your Shopify online store to MuleSoft for seamless data exchange:
- Real-time Inventory Management
- Order Fulfillment Automation
- Customer Data Synchronization
- Payment Processing Integration
- Marketing and Analytics Integration
- Multi-channel Sales
- Personalized Customer Experiences
- Streamlined Returns and Refunds
Integrating Shopify Using MuleSoft:
Shopify Account Creation:
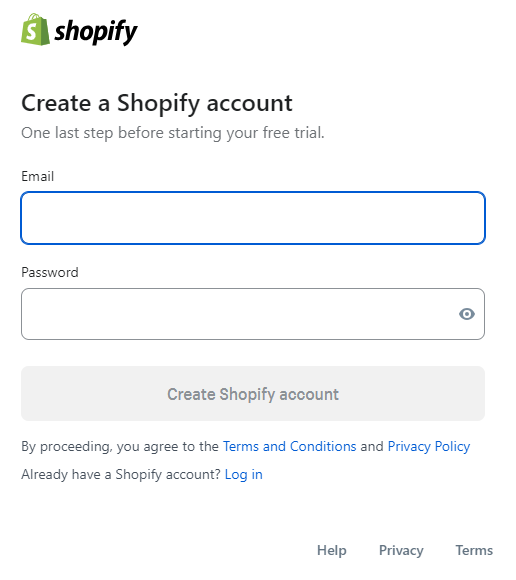
Step1: To create a Shopify account, https://www.Shopify.in/free-trial enter your email address and click on start free trial

Step2: Enter email and password and click on Create Shopify account
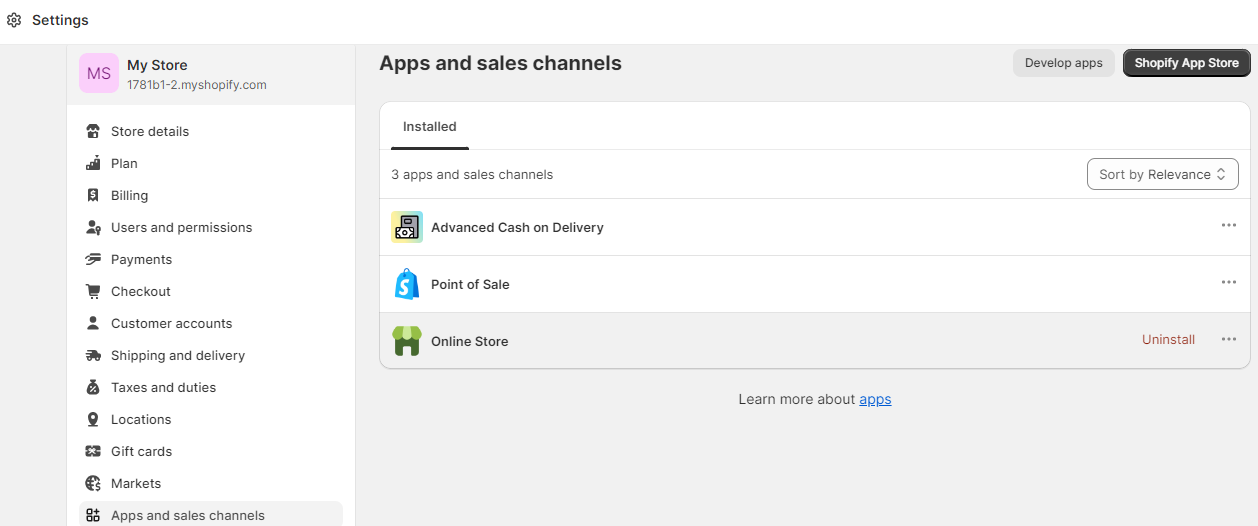
Step3: Click on settings and click Apps and sales channels then click develop apps
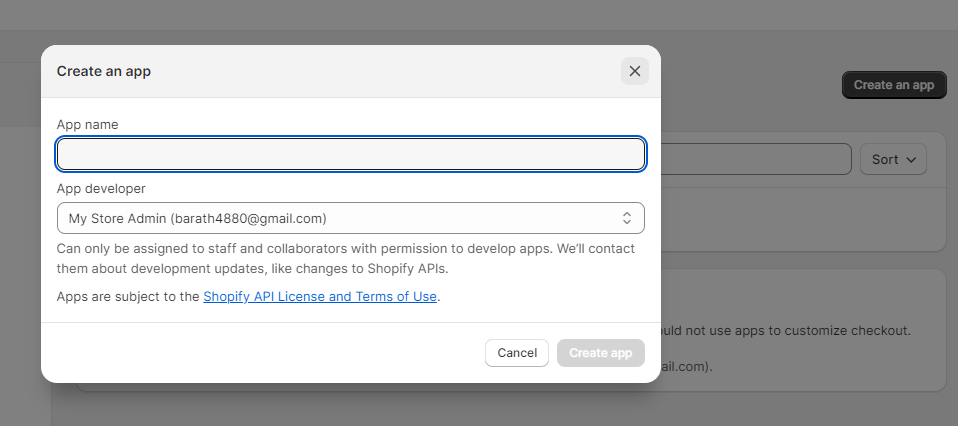
Step4: Add app name and click on create app
Step5: Click on Configure admin API scopes and add the admin access scope and add webhook version and click on save

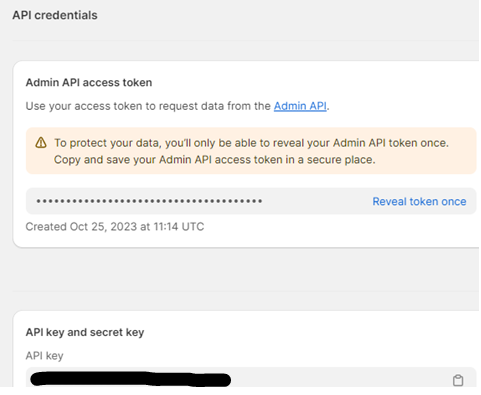
Step6: Click on install app and you will get username (API Key) and password (Access Token)
Create Mule Projects: Create a mule project in Anypoint studio.
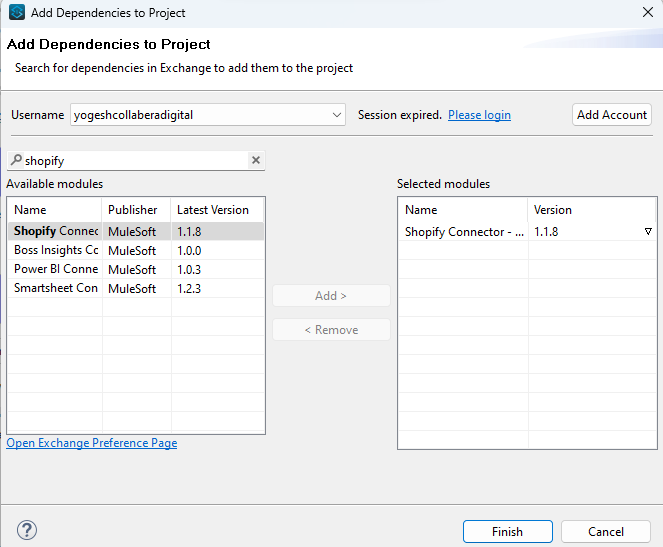
Add Shopify Connector: Within the Mule Palette, use the search function in the exchange to look for the Shopify connector. Once found, add the Shopify connector to your project. Alternatively, you have the option to directly include the Shopify connector dependency in the pom.xml file of your project.
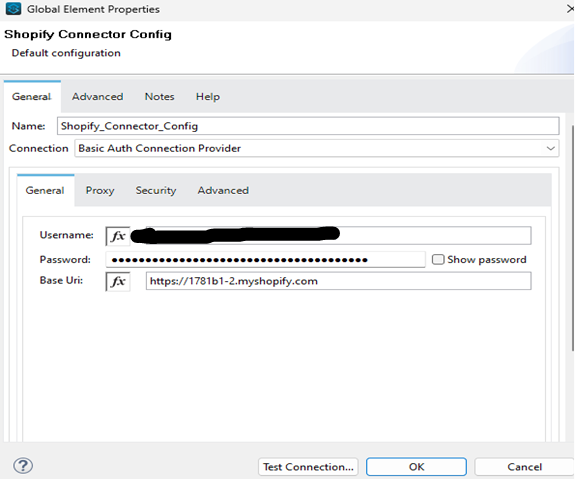
Configure the Shopify Connector: After adding the Shopify Connector, configure it by creating a global configuration that includes your Shopify credentials and connection details. To set this up, access your MuleSoft project, select "Manage Global Elements," and proceed to create a new configuration specific to the Shopify Connector. By using username, password.
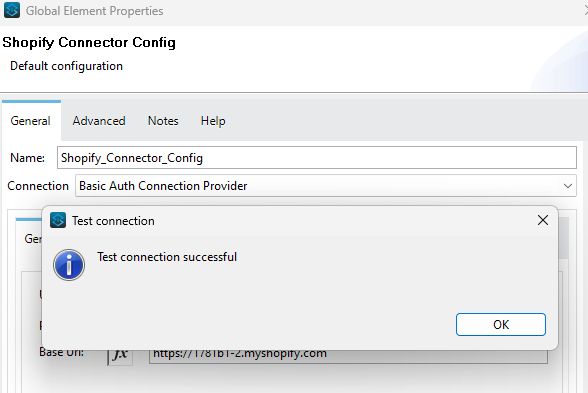
Click on Test connection:
Use the Shopify Connector in Mule Flows:
Customer Create Component:
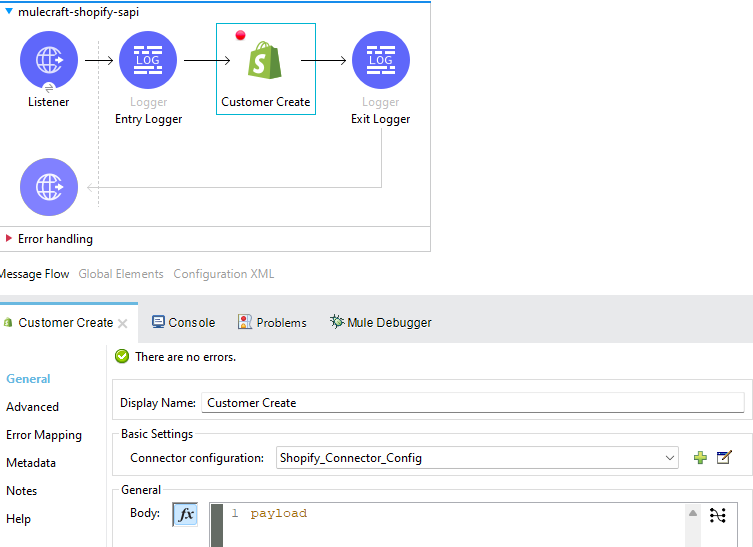
Enter below mentioned example as payload.
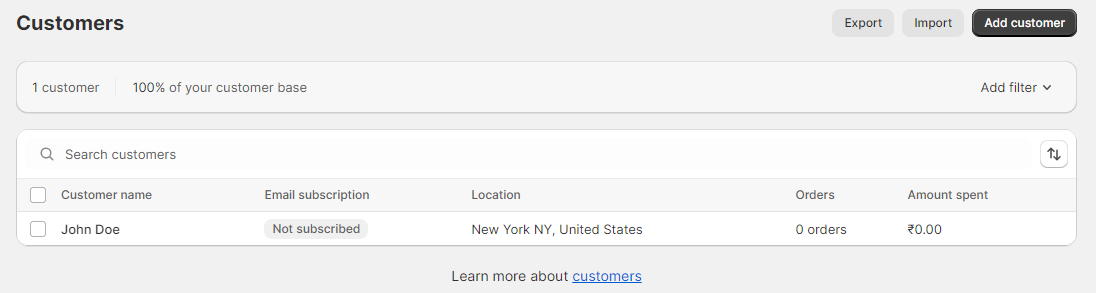
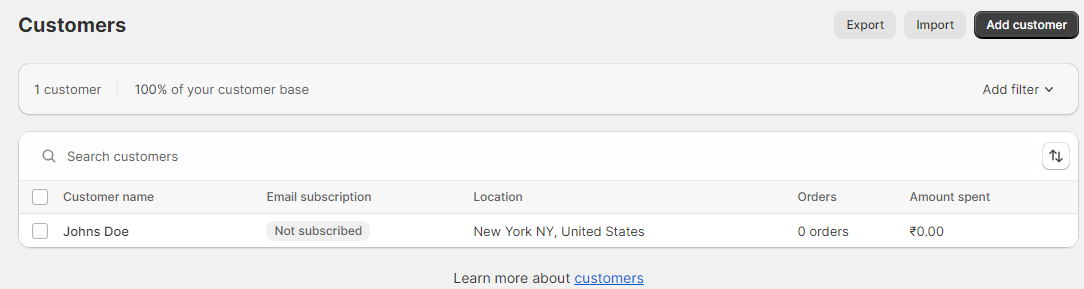
Now when accessing the customer dashboard, a new customer profile is automatically generated.
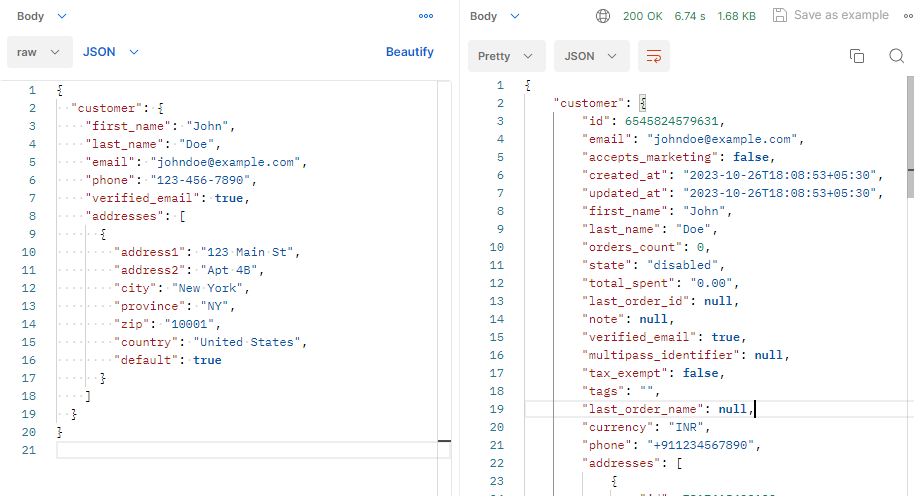
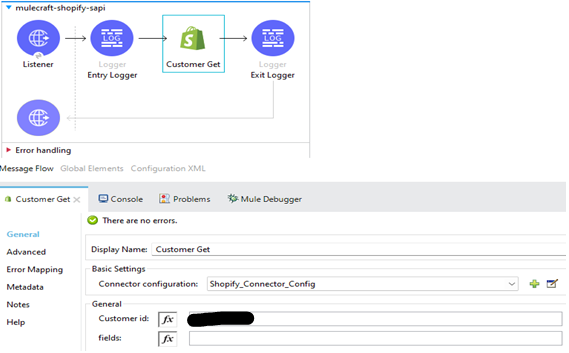
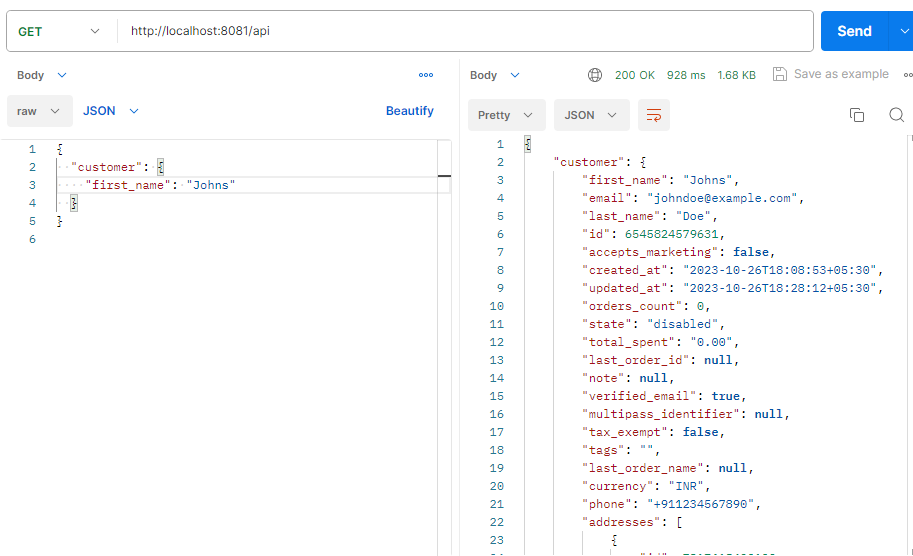
Customer Get Component:
Enter the specific customer id to get details of the customer.
After hitting the URL, we will receive the customer details of mentioned customer id as mentioned below.

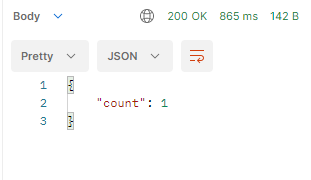
Customer Count Component:
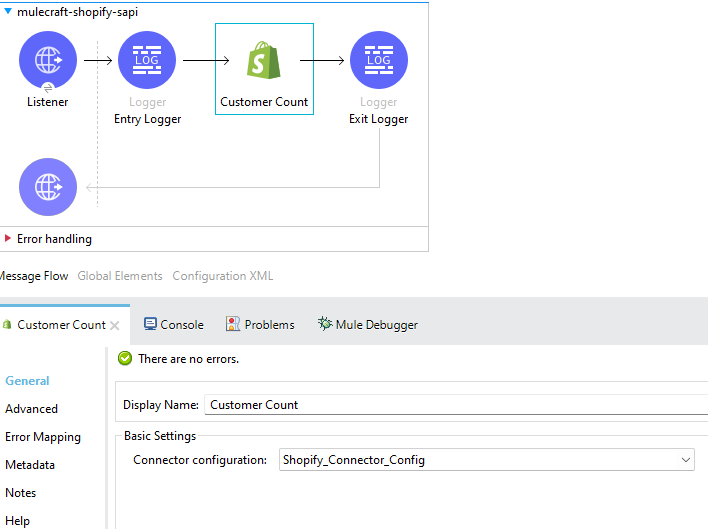
Above mentioned component will provide the count of customers available in Shopify.
Customer Update Component:
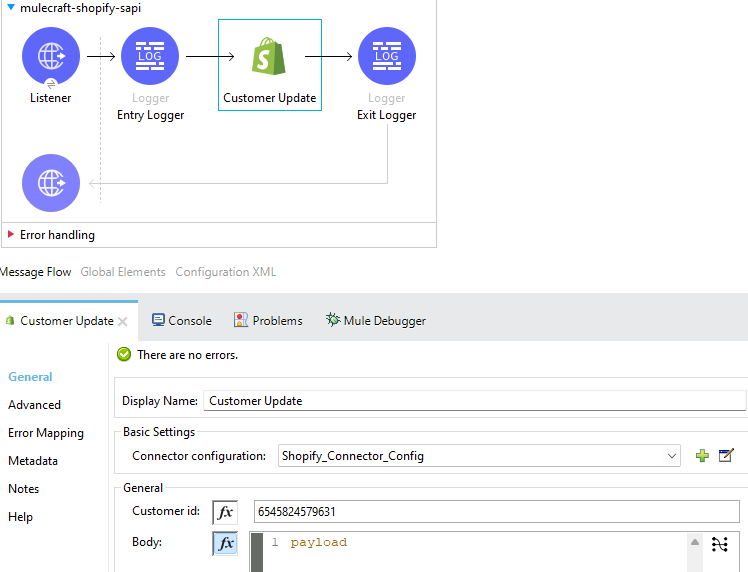
Enter below mentioned example as payload.
Now when you open the customer dashboard, existing customers will be updated.
Customer Delete Component:
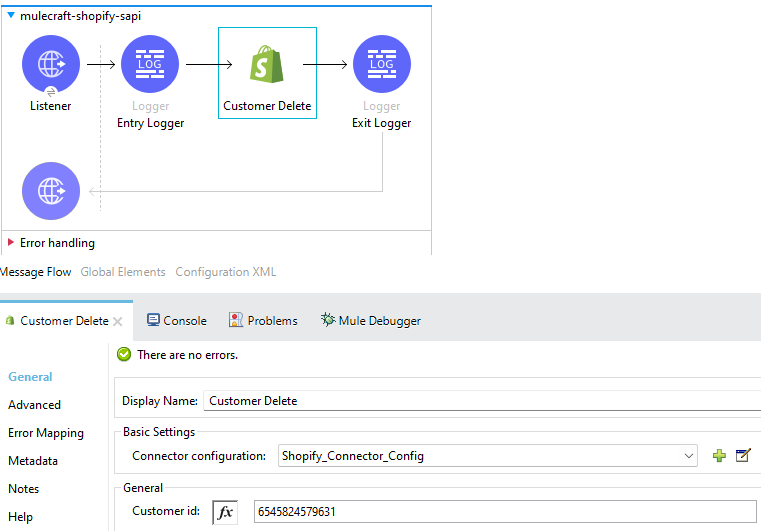
Existing customer will be deleted.
Conclusion:
Integrating your Shopify store with MuleSoft offers a transformative solution for e-commerce success. The collaboration ensures efficient data flow, improving operational efficiency and customer experience. It enables real-time synchronization, enhances scalability, and reduces manual tasks. Security and compliance are prioritized, while customization and flexibility empower adaptation to market changes. This integration is an investment in the future of your business, providing a competitive edge in a dynamic e-commerce landscape, and allowing seamless data exchange for informed decision-making and personalized customer engagement.