Data Integration Made Easy: MuleSoft's Guide to Snowflake

Snowflake is a cloud-based data warehousing platform designed for large-scale data storage, processing, and analysis. It is a fully managed and scalable data warehouse service that is offered as a cloud service on popular cloud providers like Amazon Web Services (AWS), Microsoft Azure, and Google Cloud Platform (GCP).
Here are some key features and characteristics of Snowflake:
Cloud-Native: Snowflake is built as a cloud-native data warehousing solution, meaning it's designed to take full advantage of the cloud's scalability and flexibility.
Multi-Cluster, Shared Data Architecture: Snowflake separates storage and compute, allowing you to scale these resources independently. This architecture offers automatic and dynamic resource allocation based on your workload's requirements.
Data Security: Snowflake places a strong emphasis on data security, providing features like encryption at rest and in transit, role-based access control, and audit logging to ensure data protection and regulatory compliance.
SQL Compatibility: Snowflake uses ANSI SQL as its query language, making it relatively easy for users familiar with SQL to interact with and query the data stored in Snowflake.
Zero-Copy Data Sharing: Snowflake allows you to share data with other Snowflake accounts without needing to copy or move the data. This feature simplifies data sharing and collaboration.
Semi-Structured Data Support: Snowflake can handle semi-structured data formats like JSON, Avro, Parquet, and more, making it versatile for different data types.
Data Warehousing Performance: Snowflake is known for its query performance optimization. It uses techniques like automatic query and data indexing to enhance the performance of analytical queries.
Elastic Scalability: Snowflake offers automatic and elastic scalability, meaning you can easily scale up or down as needed to handle various workloads efficiently.
Data Integration: Snowflake provides various data integration options, including support for ETL (Extract, Transform, Load) processes and connectors to popular data integration and analytics tools.
Global Data Distribution: You can choose to replicate your data across multiple regions and clouds, ensuring low-latency access to your data from different locations.
Instructions for setting up a Snowflake trial account:
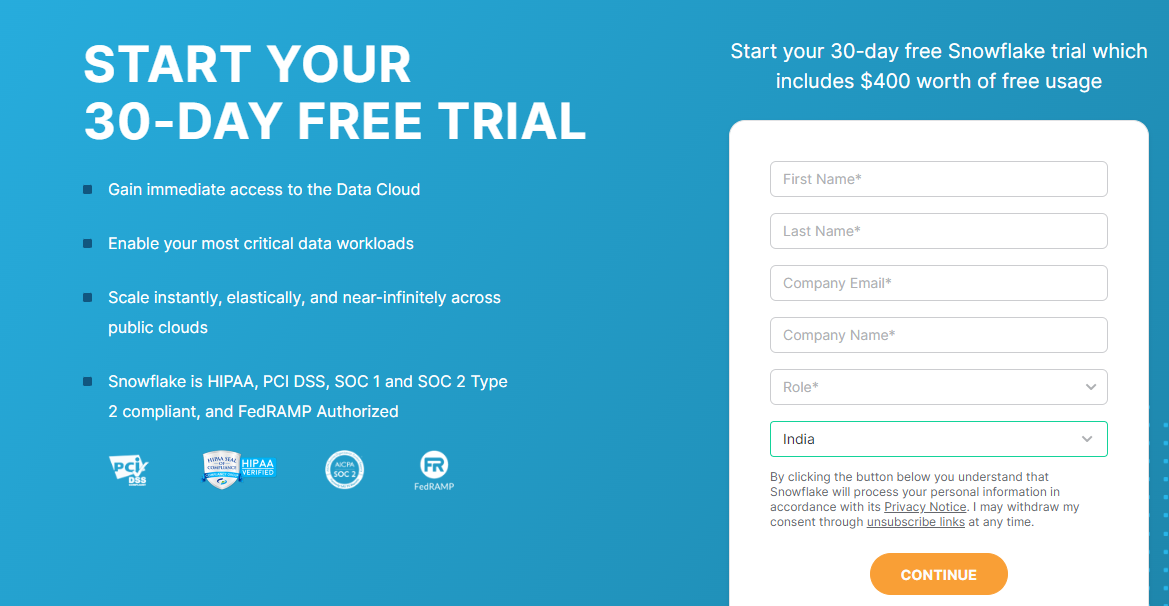
- Register for a Snowflake trial account: https://trial.snowflake.com/
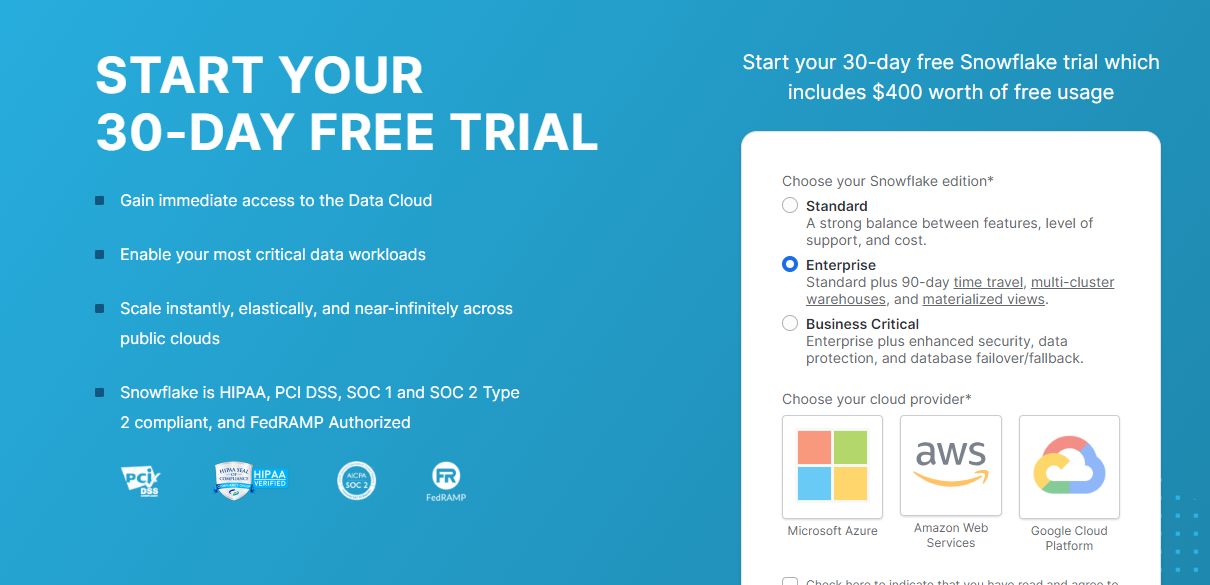
- Choose the Enterprise edition and opt for Amazon Web Services (AWS) as your Cloud Provider in Snowflake.
- An email confirmation will be sent by Snowflake to activate your account.
- Check your mail and Active Account.
- Establish your username and password to receive a unique URL for your individual account.
- Login into Snowflake and portal looks like below.
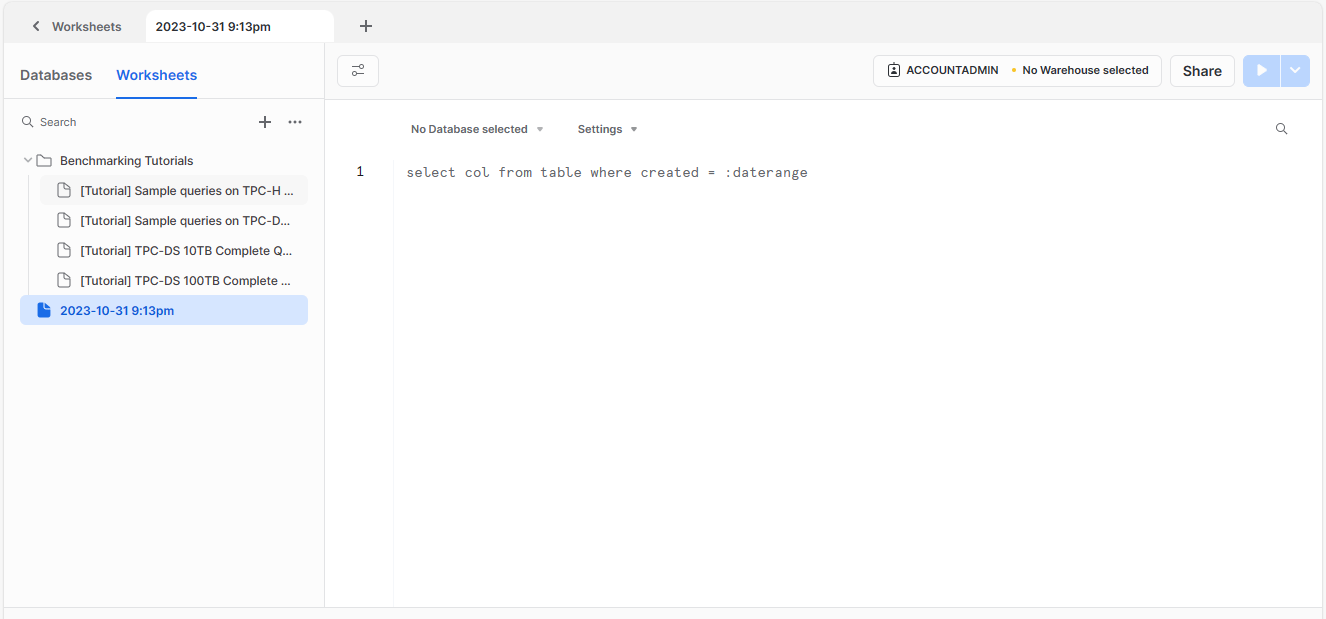
- Snowflake provides some sample databases, listed on the left of the portal.
- In the middle section, we can write a query that we want to execute.
Snowflake Connector Operations
Here is an updated list of operations available through the Snowflake connector in Any point Studio:
Bulk Delete: Delete multiple rows at a time.
Bulk Insert: Insert multiple rows at a time.
Bulk Update: Update multiple rows at a time.
Copy Into Location: Upload data from the table into one or more files.
Copy Into the Table: Load data from the file into the existing table.
Create Pipe: Create a new pipe for defining the COPY INTO statement.
Create Stage: Create a new stage to use for loading data from files to a table and vice versa.
Create Task: Create a new named external stage.
Delete: Remove data from a table.
Execute DDL: Use DDL commands to manipulate objects in Snowflake.
Execute Script: Execute a SQL script.
Insert: Insert a row into the table.
Insert Multi-Table: Insert a row into multiple tables.
Merge: Insert, update, or delete values in a table based on values in a subquery.
Select: Fetch records from the table.
Stored Procedure: Invoke a stored procedure on the database.
Update: Update a specific row with a new value.
Steps to integrate Snowflake with MuleSoft:
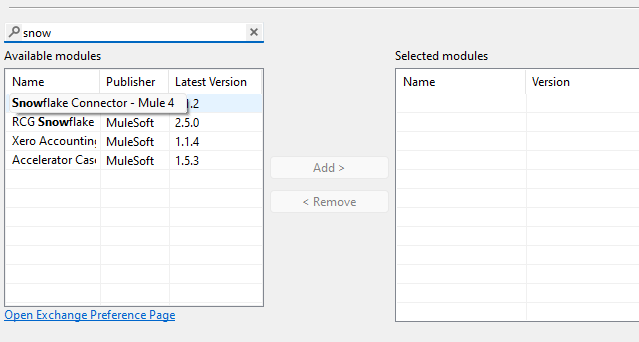
- Add Modules to your mule palette from exchange.
Connection Using MuleSoft Connectors:
Using generic connection:
Connection properties can be configured /customized based on requirement.
Data Source reference connection (Spring bean based)
Connection properties can be configured /customized based on requirement.
Spring properties can be used for DB operations.
Can be used to perform URL based security mapping connection.
Snowflake Connection:
Optimized approach.
Snowflake Connector Installation
- Integrate the Snowflake Connector into your Mule project from the Anypoint Exchange.
- In the Mule Palette, click the (X) icon to access the Exchange.
- Within the "Add Dependencies to Project" dialog, enter "snowflake" in the search field.
- Locate the "Snowflake Connector" in the available modules.
- Click "Add" and then "Finish" to include the Snowflake Connector in your project.
HTTP Listener Configuration
- Add the HTTP Listener to your project from the Mule Palette and configure it according to your requirements.
Select from Snowflake Component
- Include the "Select from Snowflake" component that you previously added from the Anypoint Exchange into your Mule project.
Connector Configuration
- Configure the Snowflake Connector with the following details:
Account Name: Use the Account Name found in the URL received via Gmail from Snowflake. For example, if the URL is "https://app.snowflake.com/duzsaoq/zs10672/#/data/databases/MULESOFT/schemas/PUBLIC ", the Account Name is "duzsaoq-zs10672".
Warehouse: Specify the name of the virtual Snowflake warehouse that you intend to utilize.
Database: Mention the name of the Snowflake database. In this example, we are using the sample database named "mulesoft"
Schema: Provide the name of the schema.
User: Enter the UserID associated with your Snowflake Account.
Password: Input the password for your Snowflake Account.
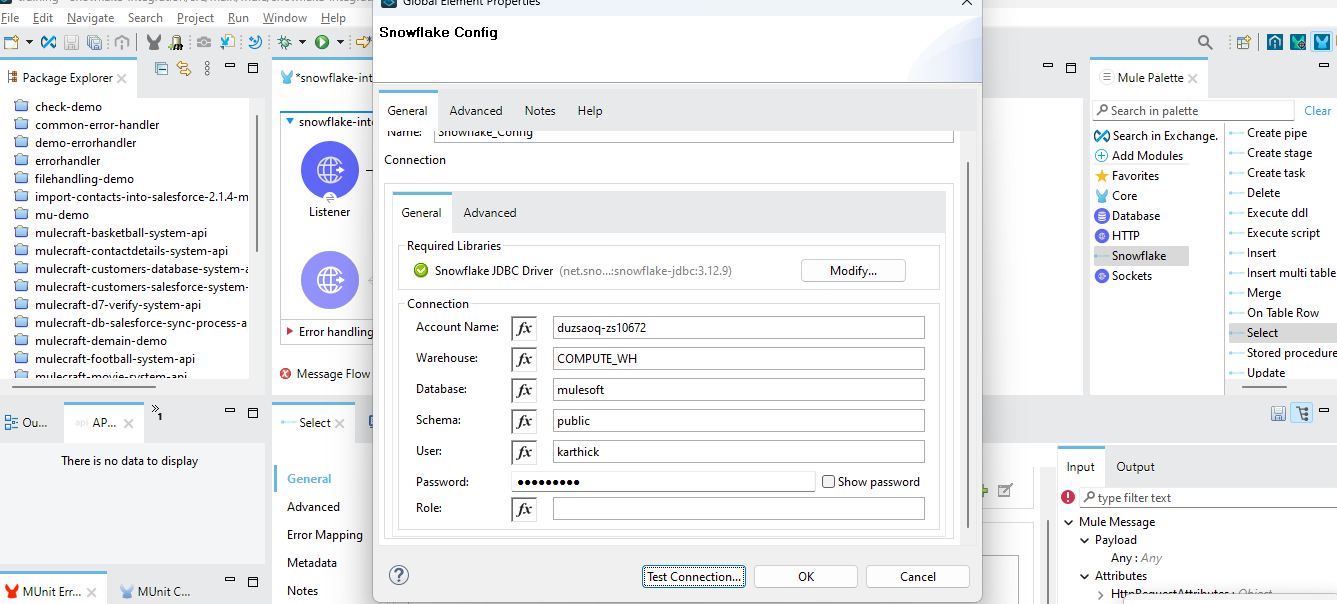
Adding the JDBC Driver and Maven Dependency
Configure the Project:
- Access the project configuration.
Add Maven Dependency:
- Choose to include a Maven dependency for the JDBC driver.
Configuration Details:
- Configure the Maven dependency with the following details: (Specify the necessary details for the Maven dependency, including the group ID, artifact ID, version, and any other required information as needed for your JDBC driver.)
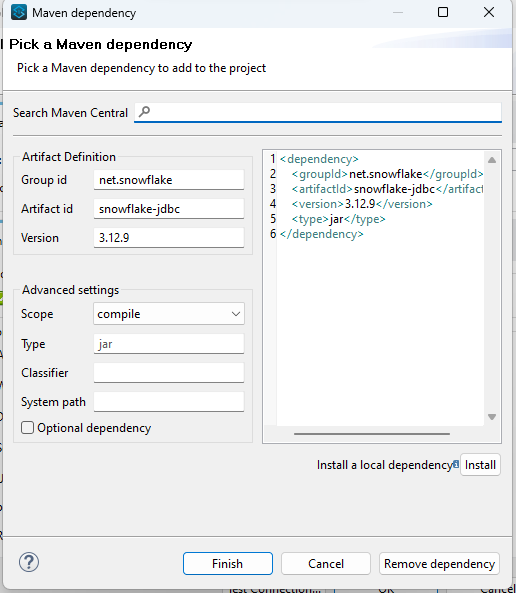
Click "Finish" to initiate the download of the dependency. Include a "Transform Message" component to convert the payload into JSON format following these steps. Incorporate a "Logger" component to display a log message on the console in a similar manner.
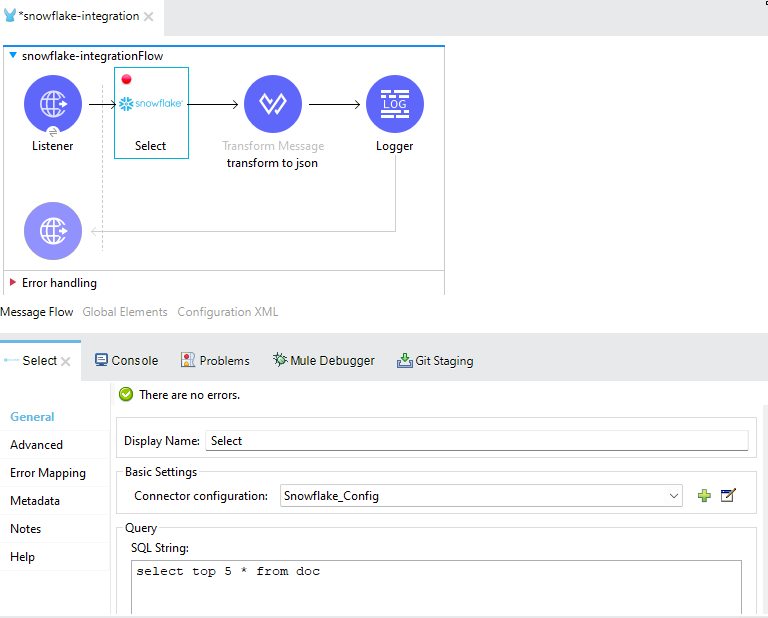
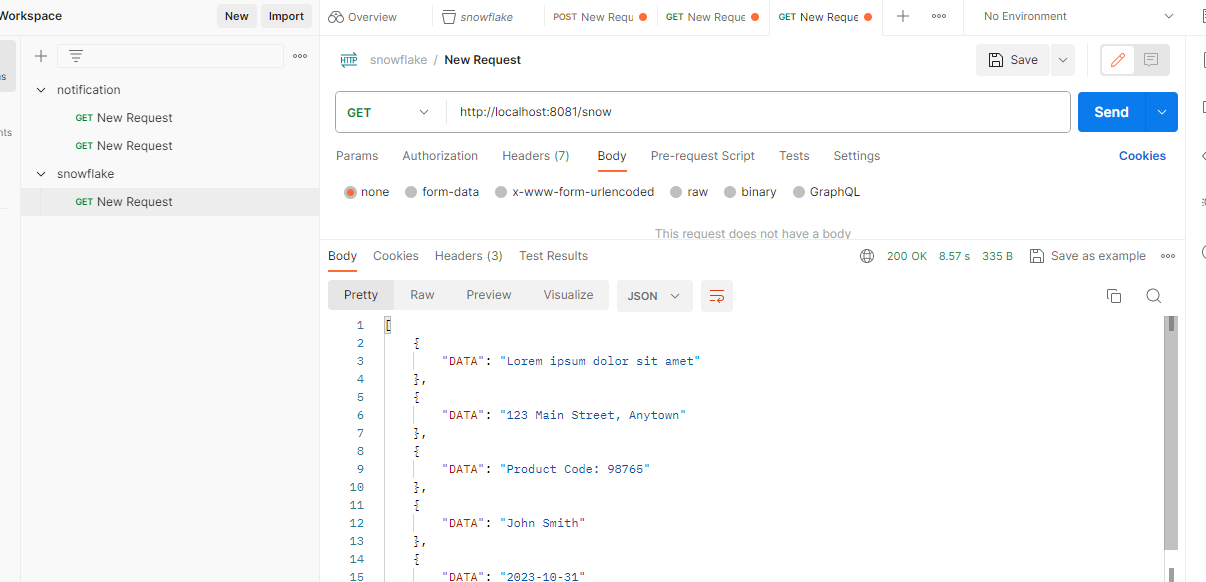
- Execute the flow to obtain the results as described.
- Using Postman, send a request to the URL "http://localhost:8081/snow" in the same way.
In conclusion, the integration of MuleSoft with Snowflake represents a powerful synergy for organizations seeking to harness the full potential of their data. MuleSoft's seamless data flow and real-time access capabilities, coupled with Snowflake's cloud-native data warehousing and security features, create a robust solution for data integration and analytics. This partnership streamlines data collaboration, facilitates efficient ETL processes, and offers scalability in multi-cloud environments. Together, MuleSoft and Snowflake empower businesses to modernize their data management infrastructure, enabling data-driven decision-making and fostering a competitive edge in today's data-centric landscape.
