GETTING ALL LOG DATA IN SPLUNK WITH UNIVERSAL FORWARDERS

In this blog, I’ll show you how to get log data into Splunk Enterprise using Splunk Universal Forwarder. Splunk is a powerful data analytics and monitoring platform used to harness valuable insights from machine-generated data.
By learning how to effortlessly gather all your log data using Universal Forwarders you can supercharge your analytics and monitoring capabilities.
FORWARDER
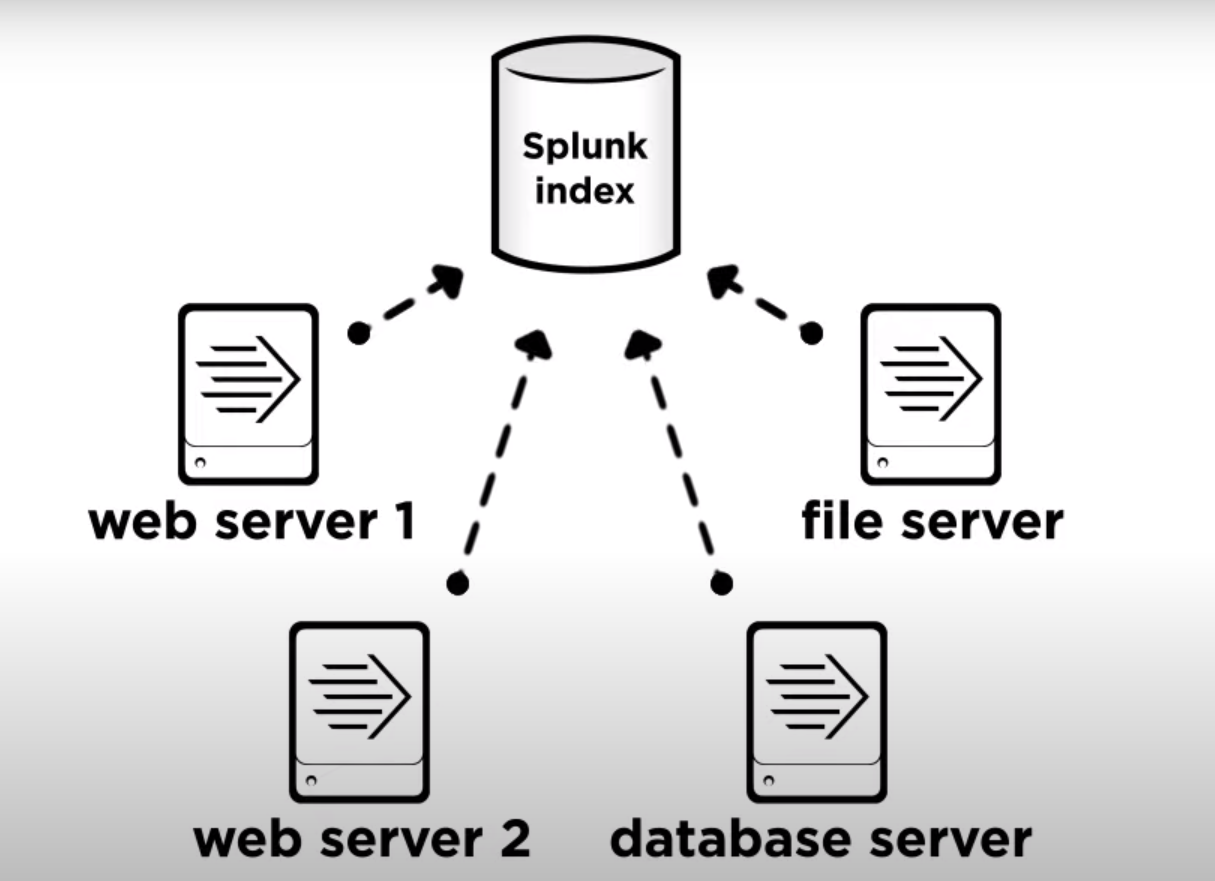
Forwarders are lightweight installations of Splunk that live on your production servers and forward data in your Splunk instance for indexing.
INDEXER
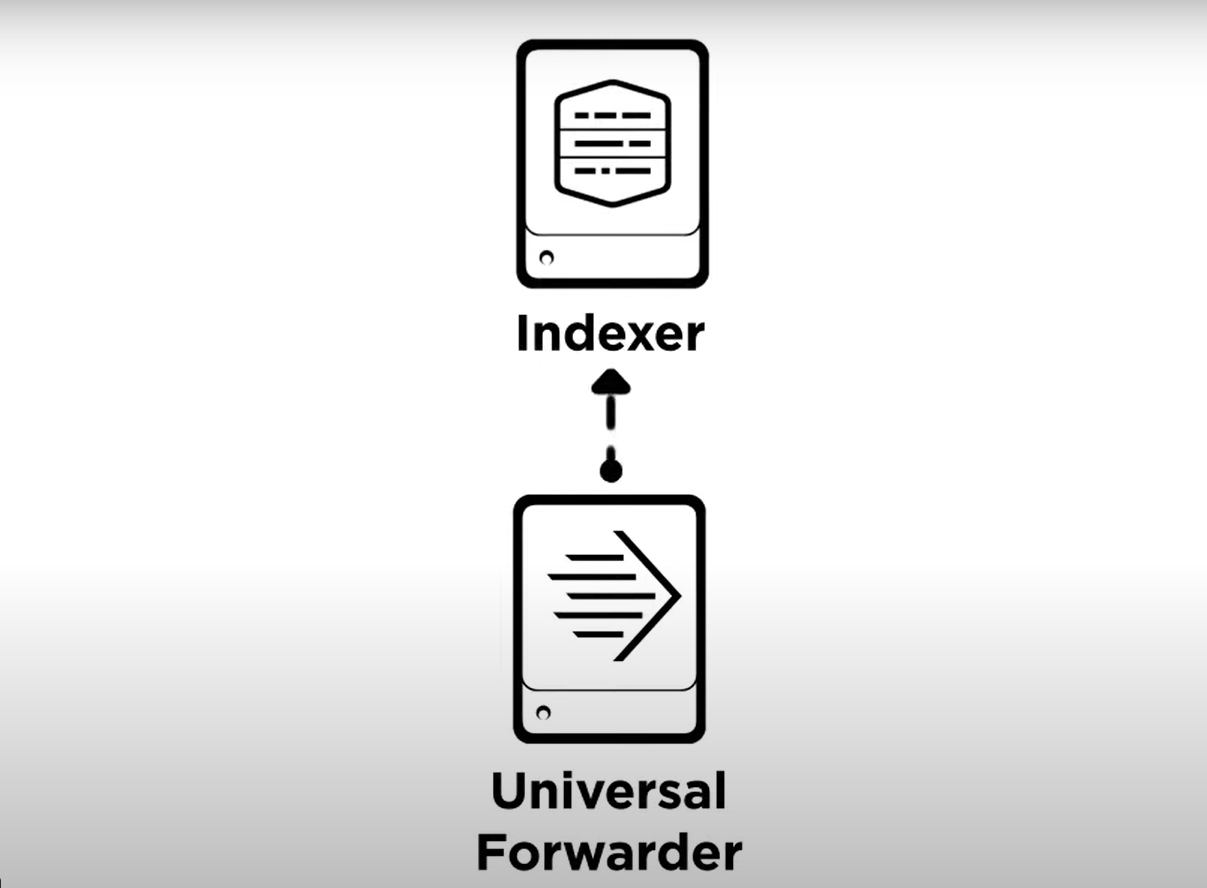
Let’s look at a simple demonstration of how forwarders work on the Splunk Indexer. On this Splunk Indexers we can configure ports for our universal forwarder to send data over.
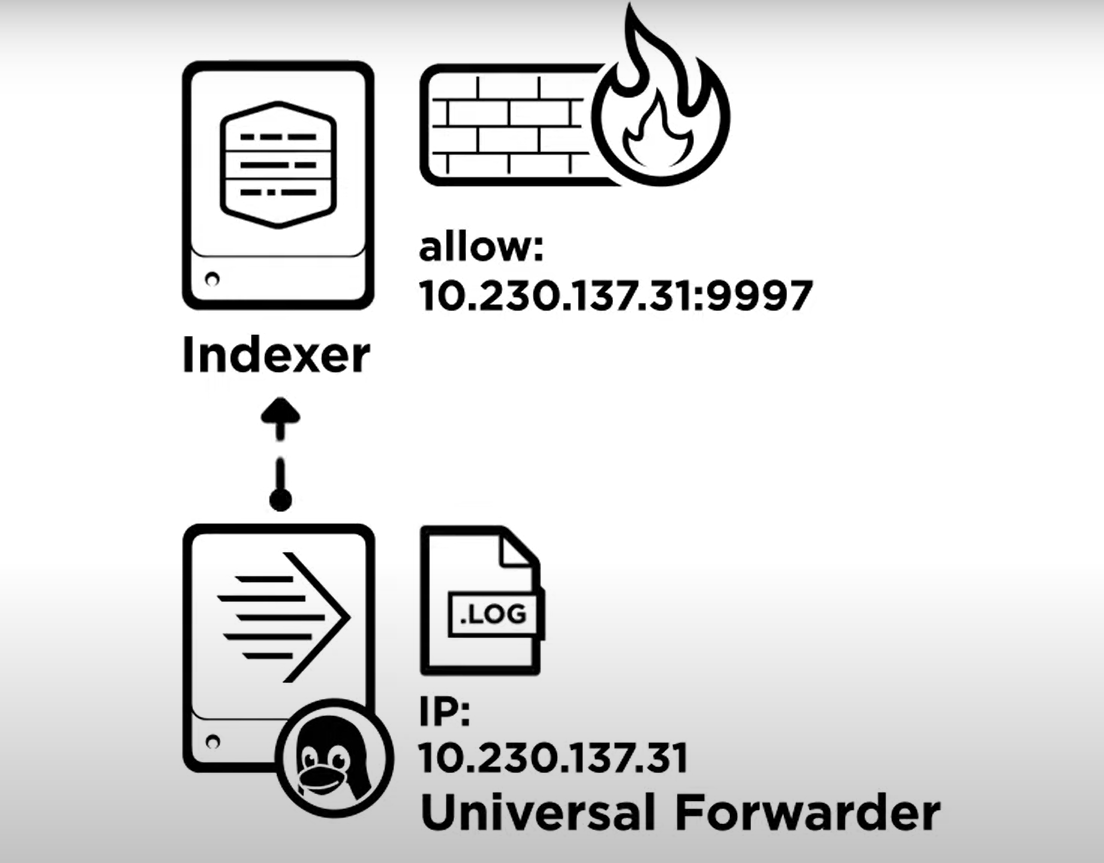
In this example, we are going to use Port 9997. On the servers we want to forward data from, we install the universal forwarder, tell them what data to send, and where to send it. That’s really all there is to it! Now, let’s take this step by step to show you how it’s done.
The first step is to set up our receiver or indexer. We login using an admin account on the Splunk Enterprise instance that will be indexing the data.
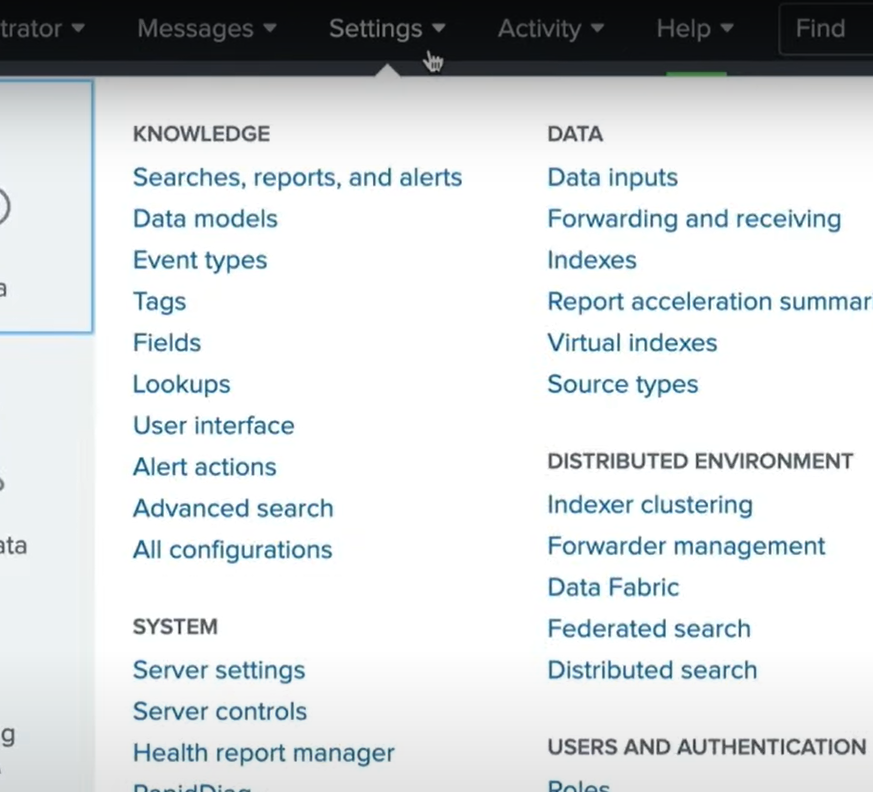
From the Settings menu, we select “Forwarding and receiving”.
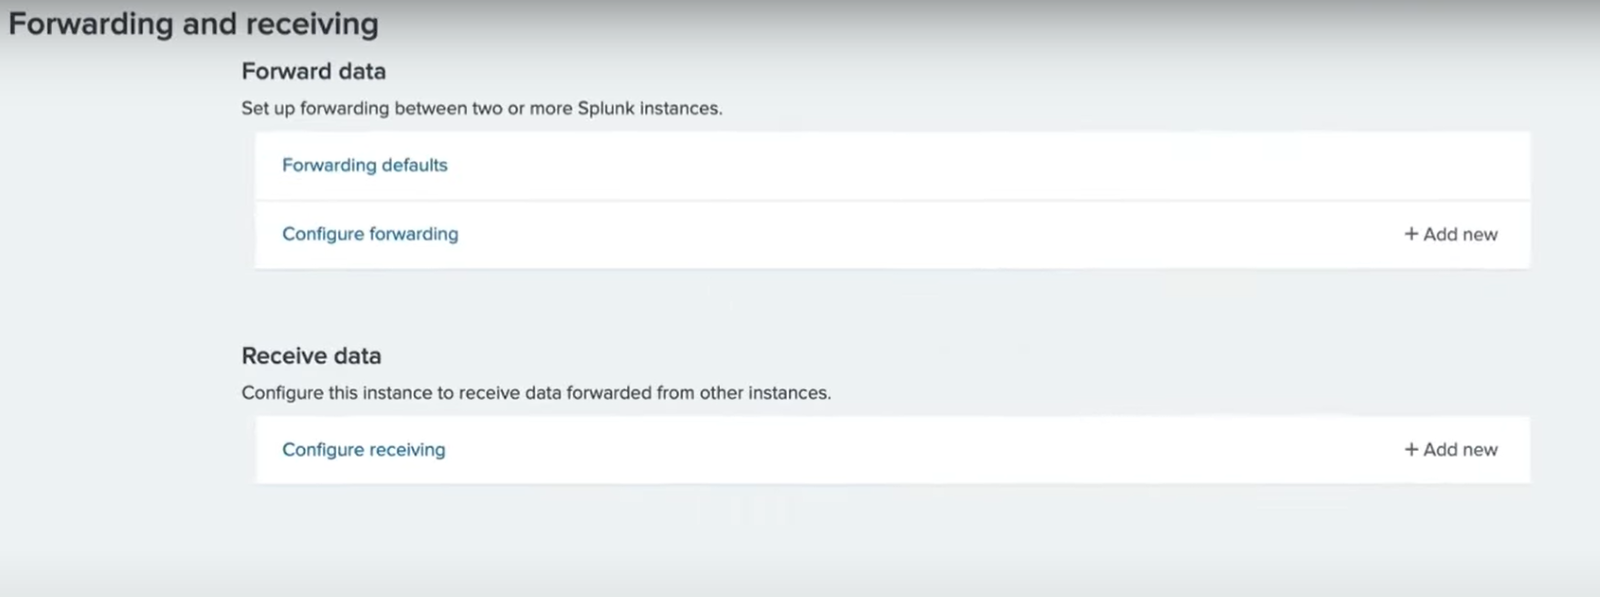
Next, we select “Add New” next to “Configure receiving”.
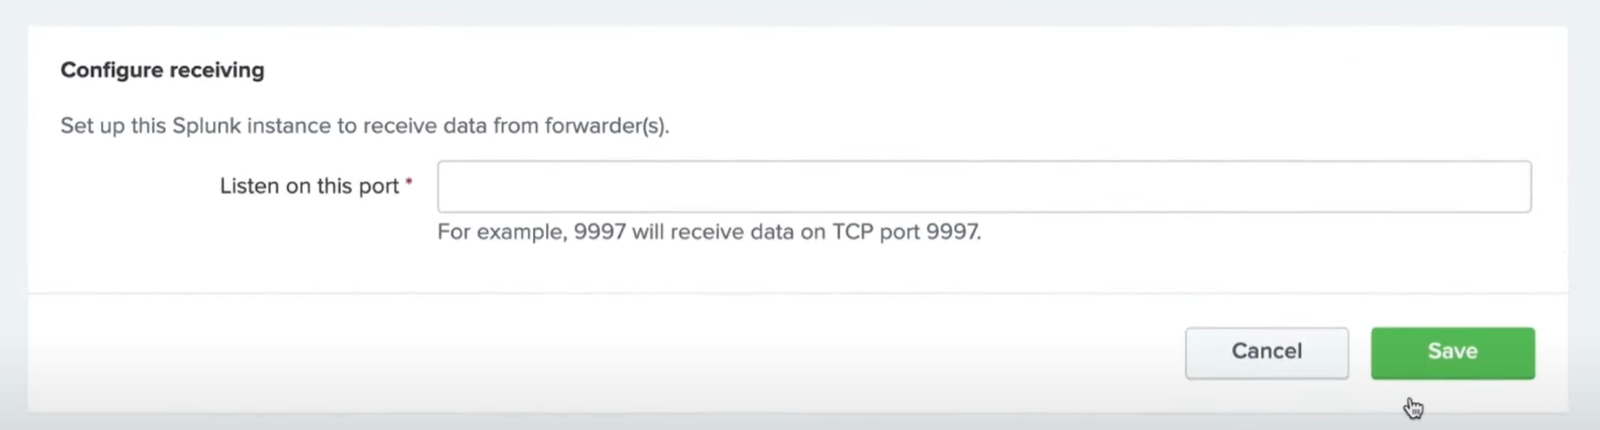
Here we specify which TCP port the indexer should listen on. In this example, we are going to use port 9997. On the following screen, we see our settings were successfully saved.
We could also use the “Splunk enable listen” comment via the CLI or edit the configuration file manually to enable the port.
Now that we have our receiving indexer configured, we will set up a universal forwarder to send data.
We will be installing a universal forwarder on an Apache web server, but you can forward almost any type of machine data to Splunk.
To download the universal forwarder, we go to the Splunk.com home page and select “Free Splunk”.
In the top right corner, we are asked to create an account, or login to an existing one. From the download page, we select the “Download Now” button for the Splunk Universal Forwarder.
We select the OS and version for our web server and click “Download Now”
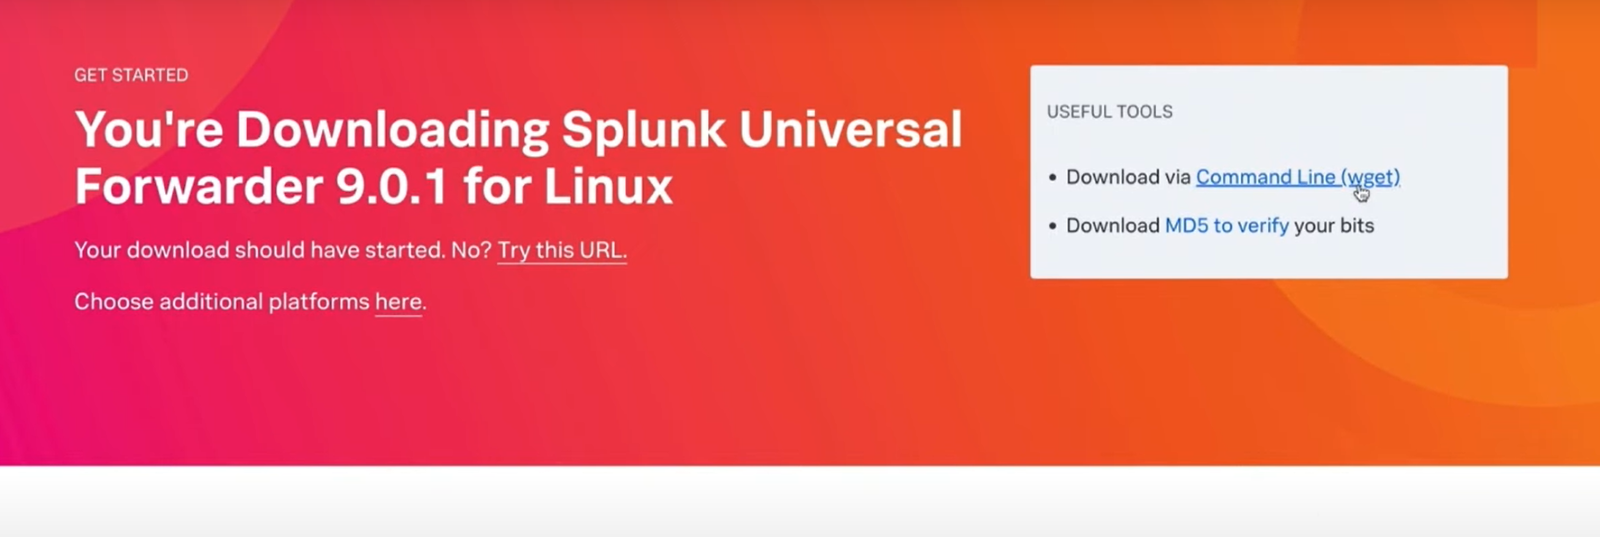
Splunk also provides an option to use wget if you choose. For this demo, we’ve already logged in and uploaded the files to our web server.
Splunk can live in any accessible directory. In this demo we’ll install in the “opt” directory, so let’s untar the archive there.

We then navigate to the “bin” directory inside the “Splunk forwarder” folder. The bin directory is where we can run the executable command “Splunk”. We start the forwarder for the first time using “Splunk Start” command. We want to automatically accept the license, so we add the optional “accept-license” argument.

We’re prompted to set up an admin account with a password and confirm it.
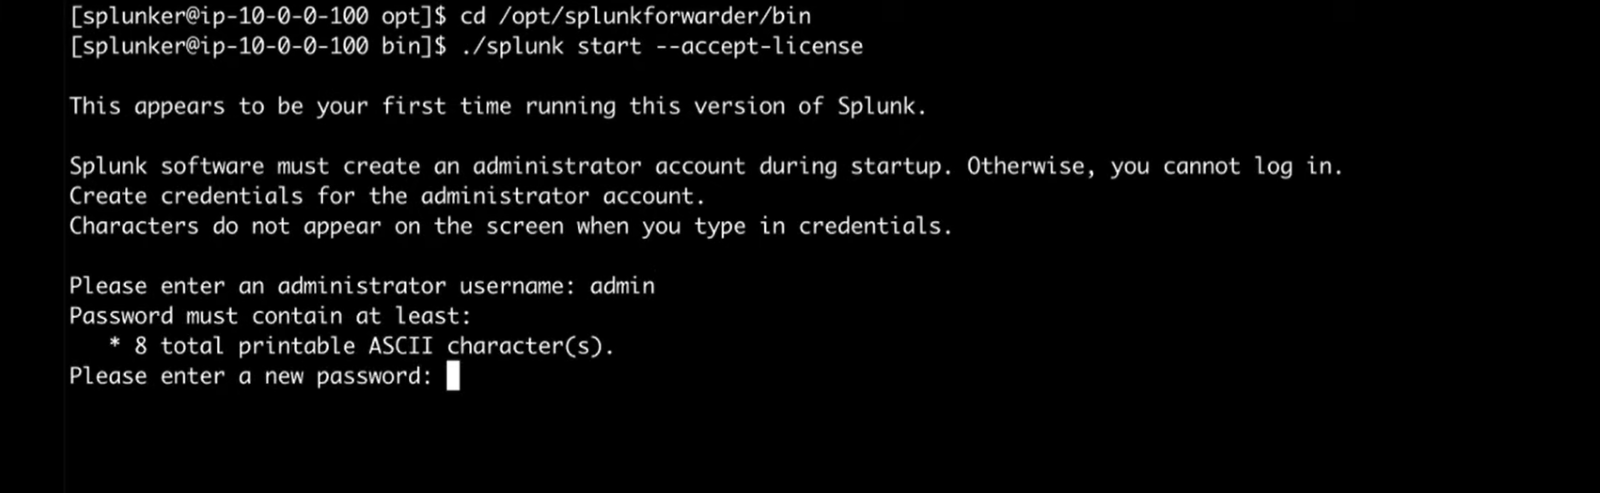
To keep data from being lost, a universal forwarder should start whenever the server reboots, so we use the “enable boot-start" command next.

And give “exit” command.
Now we configure the universal forwarder to send data to our receiving indexer. We use the “add forward-server" command with arguments of the address and port of our receiving indexer.

We are prompted for the username and password of the admin account we created during installation. Next, we need to tell the universal forwarder what data to send to the indexer. The “add monitor” command is used to tell the universal forwarder what machine data you’d like to send. Here, we are telling the forwarder to send all logs located in the www1 folder to Splunk for indexing.
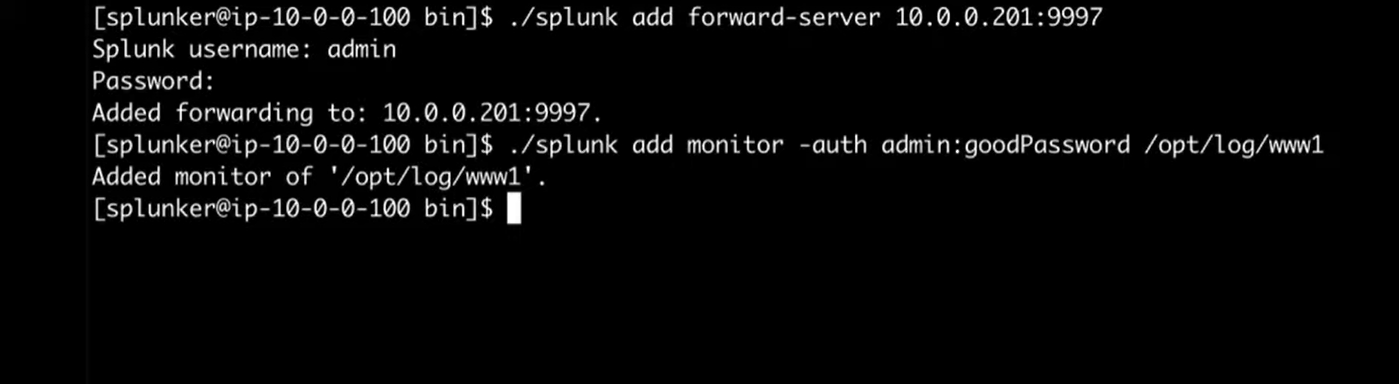
Note: If you want to send mule log here you just send to the mule log folder through this command.
Returning to the receiving indexer from the Search and Reporting app,
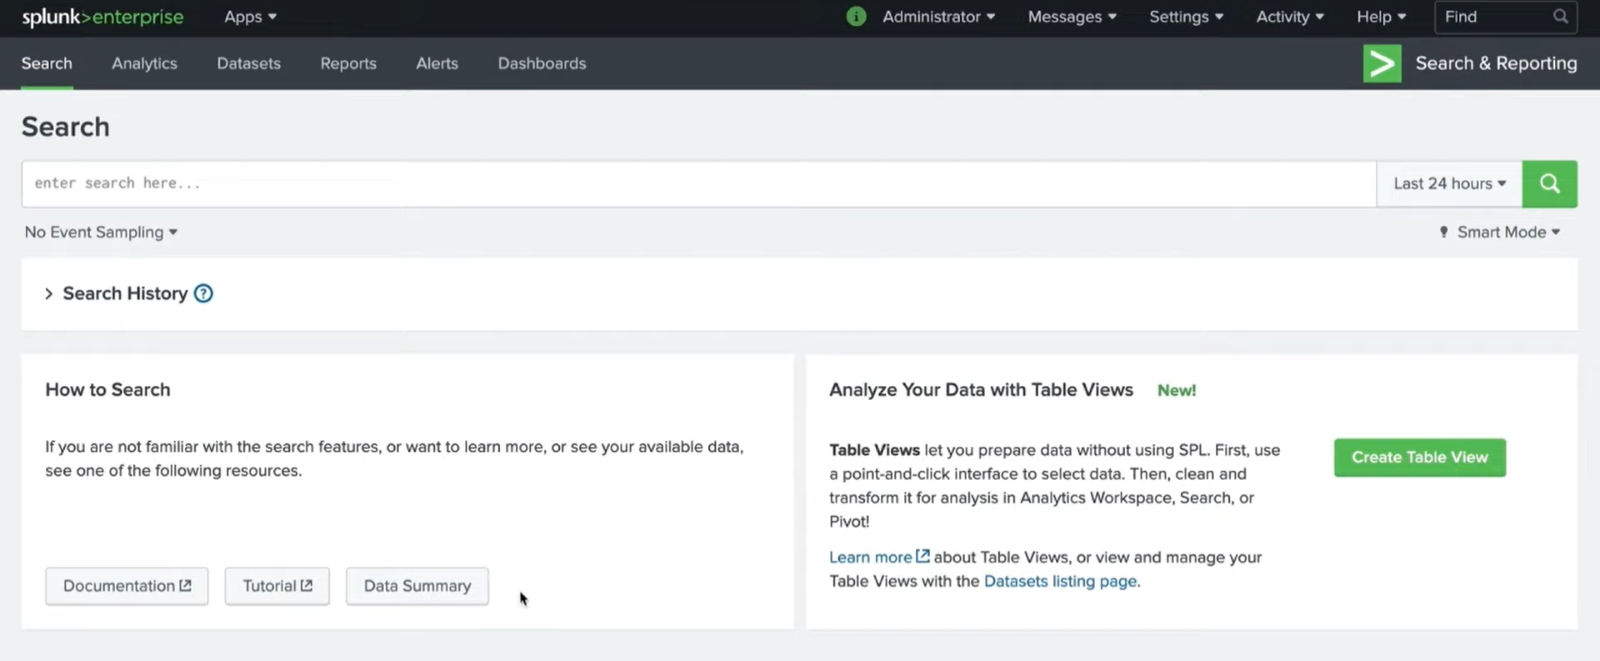
We click on “Data Summary” to verify the data is being indexed on our Splunk Enterprise instance.

Now that we have the data indexed, we can start building reports, visualizing our data, and so much more.
In conclusion, harnessing the power of Universal Forwarders to collect all log data is a pivotal step towards achieving comprehensive visibility, enhancing security, and optimizing performance in your IT environment. With their flexibility, scalability, and cross-platform compatibility, Universal Forwarders serves as a linchpin in the quest for data-driven insights and informed decision-making. By implementing these efficient data collection tools, organizations can unlock the full potential of their log data, ensuring that no valuable information goes unnoticed, and ultimately strengthening their overall operational and security posture. So, if you aim to stay ahead in the digital age, Universal Forwarders are a must-have component of your data management strategy.