Streamlining CI/CD with Buildkite: Installation and Setup of Buildkite
In this article, we will delve into the details of Buildkite, a powerful tool for continuous integration and continuous deployment (CI/CD). We'll discuss its key features and benefits and provide a comprehensive guide on how to set up and use Buildkite to streamline your CI/CD pipeline.
CI/CD
A CI/CD pipeline is a series of automated steps that helps software teams deliver code faster, safer, and more reliably. By automating the build, test, and deployment processes, CI/CD pipelines reduce the risk of manual errors, ensure consistent output quality, and enable rapid iteration and deployment of applications.
Buildkite
Buildkite is a cloud-based continuous integration (CI) and continuous delivery (CD) platform designed to help development teams automate the building, testing, and deployment of their code. It provides a range of features and capabilities to streamline and enhance the development lifecycle.
Here are some key aspects of Buildkite:
Pipeline Management
Define your build pipelines using code, typically YAML files, which can be versioned and stored in your repository.
Scalability
Unlike many CI/CD services that run builds on their own infrastructure, Buildkite allows you to run agents on your own infrastructure, giving you control over the build environment and scalability.
Integrations
Integrates with popular version control system platforms like GitHub, GitLab, Bitbucket, and others.
Notification Systems
Supports notifications via various channels such as Slack, email, and webhooks.
Customization
We can customize the build environment to suit your specific needs, including using Docker for isolated build environments.
Security
Since build agents run on our infrastructure, sensitive data and code remain within your controlled environment.
Access Controls
Granular permissions and access controls to manage who can view and modify pipelines and builds.
Installation and Initial Configuration
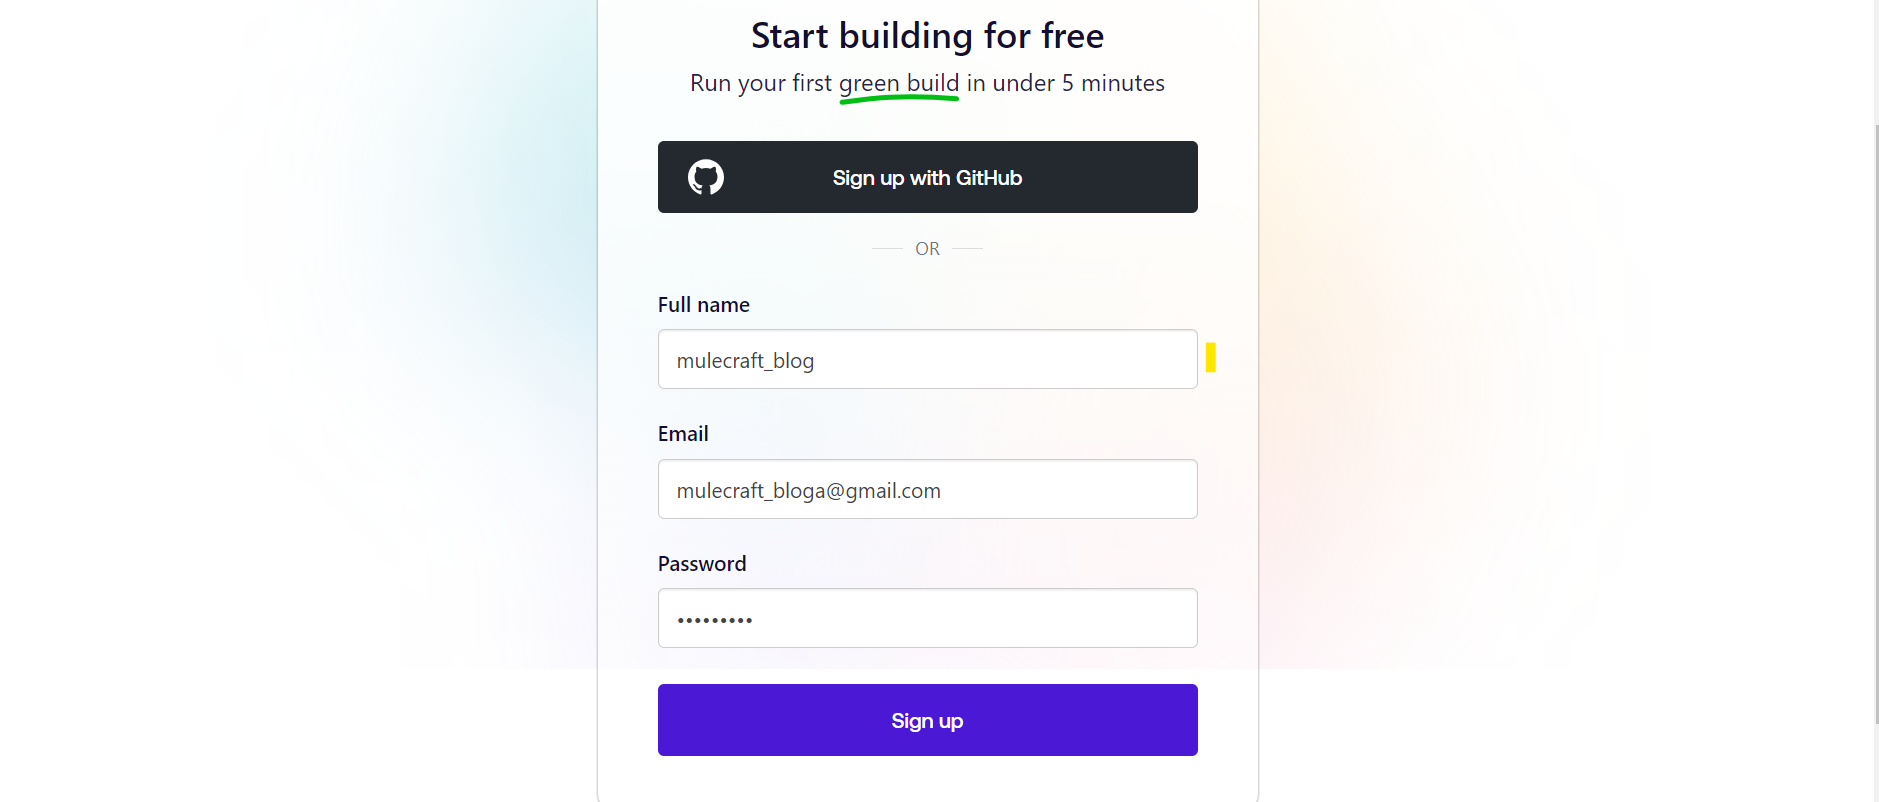
Signup in the buildkite website(https://buildkite.com/signup).
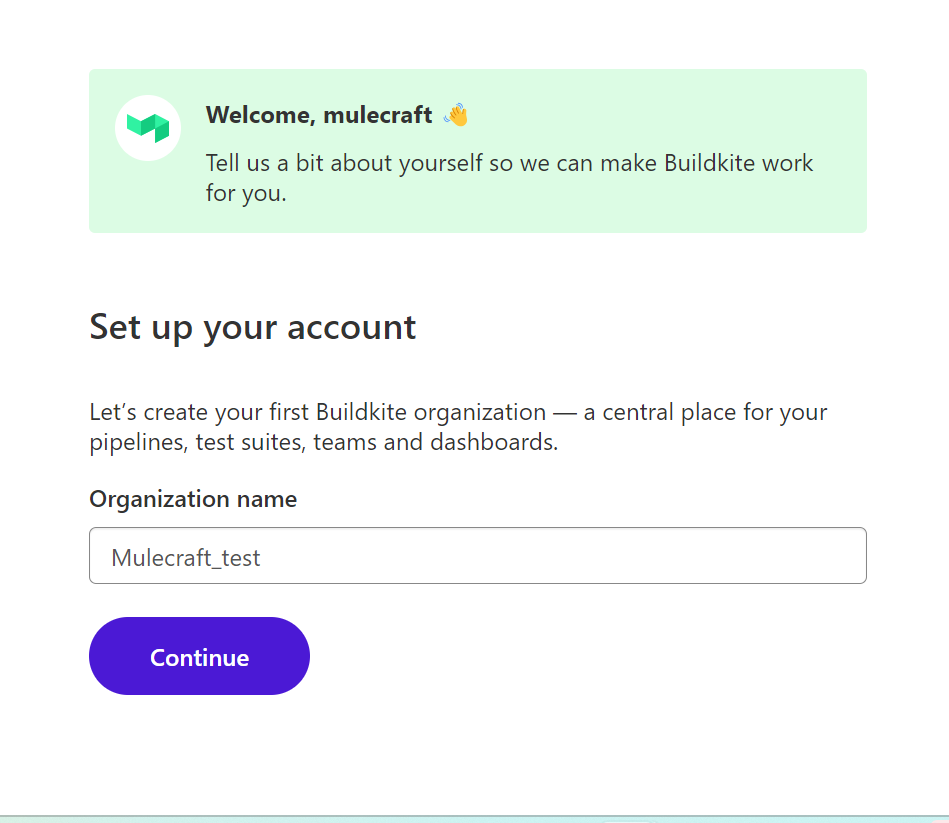
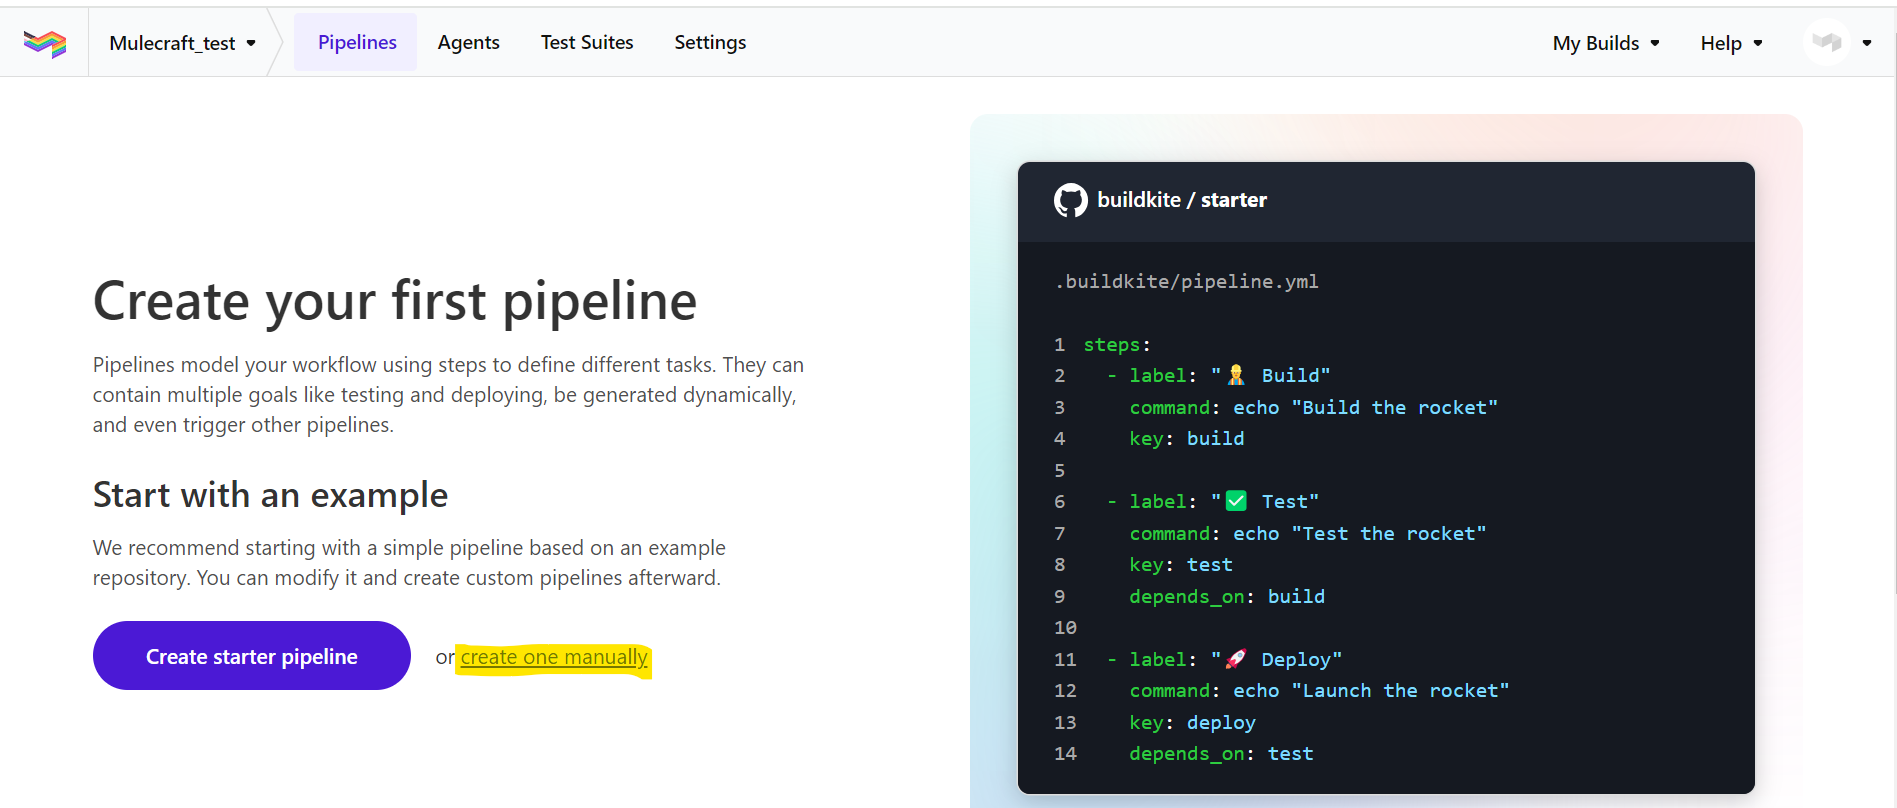
After entering basic info, you will navigate to this below page.
Let's connect your repository with your buildkite account.
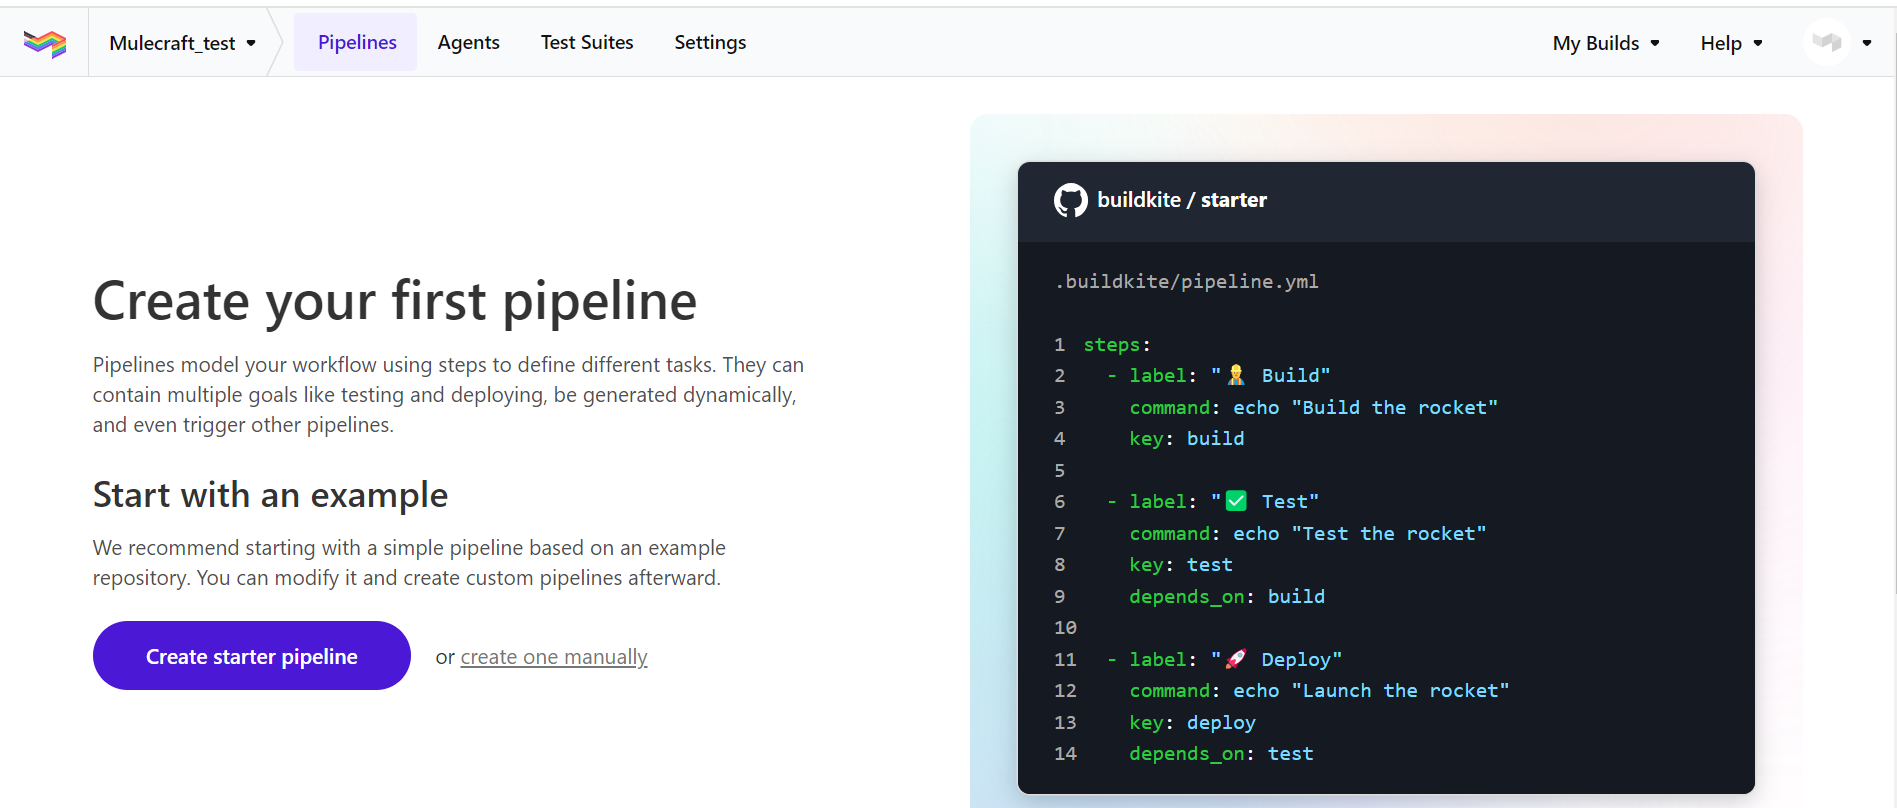
Click the create one pipeline manually.

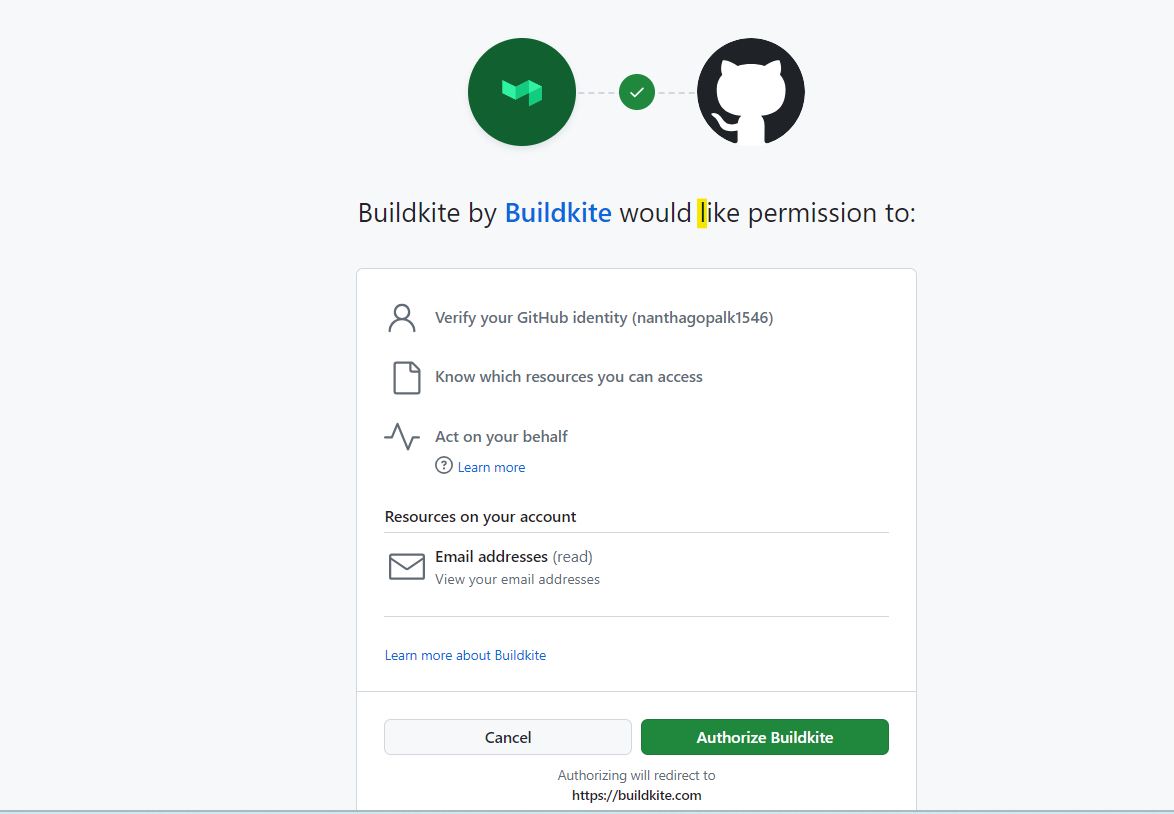
Here I picked github. It will request to authorize the github account.
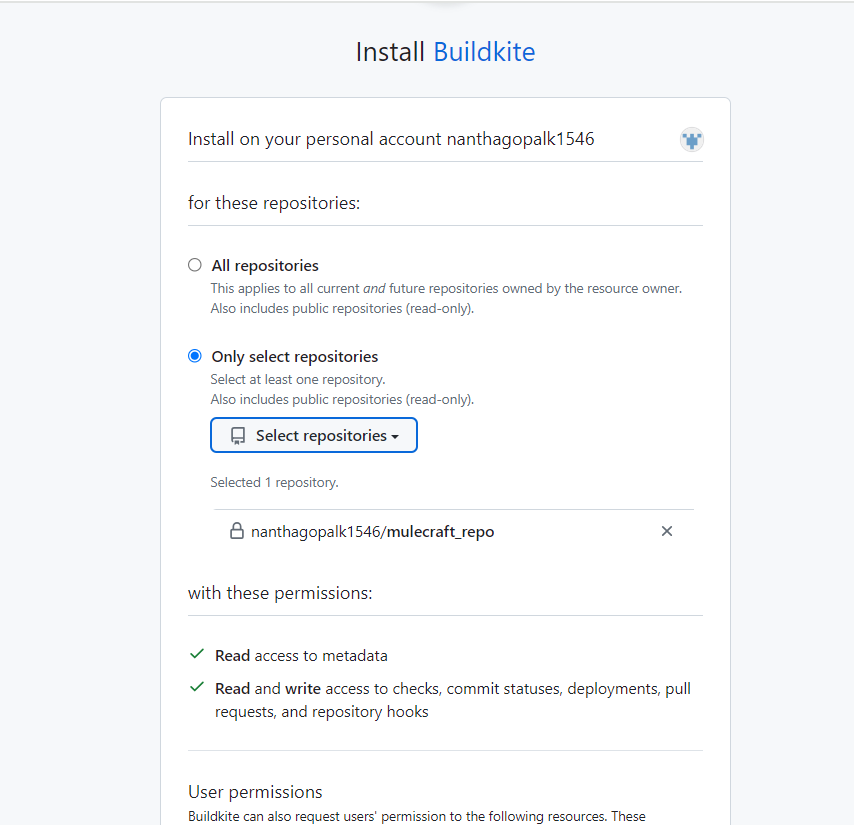
You can install buildkite either in all repositories or on selected repositories.
Once connected with github you will receive a notifcation as shown below.
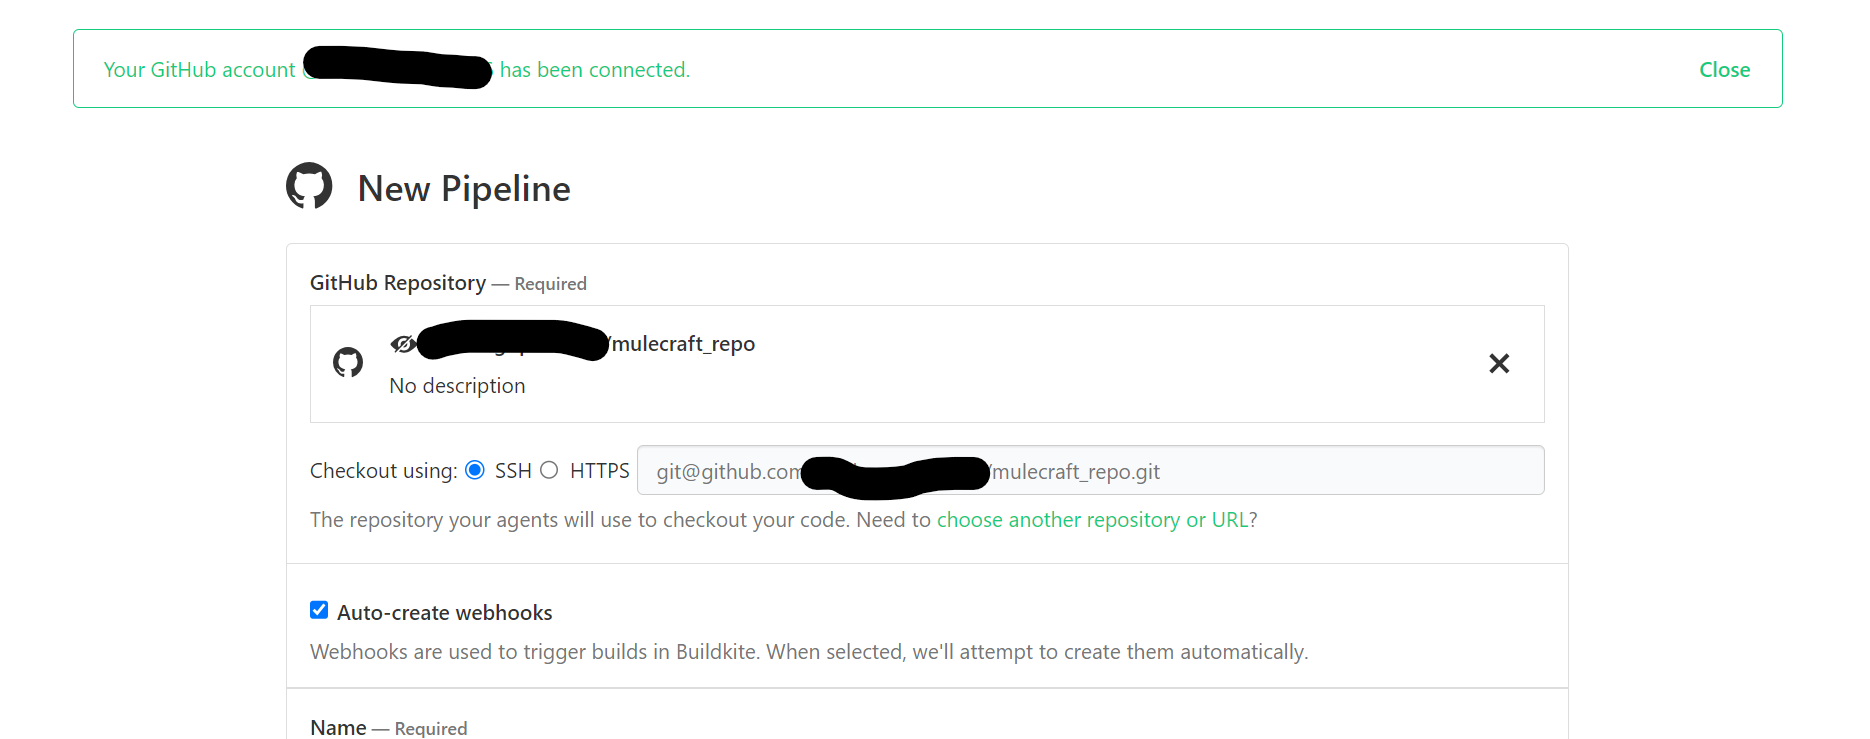
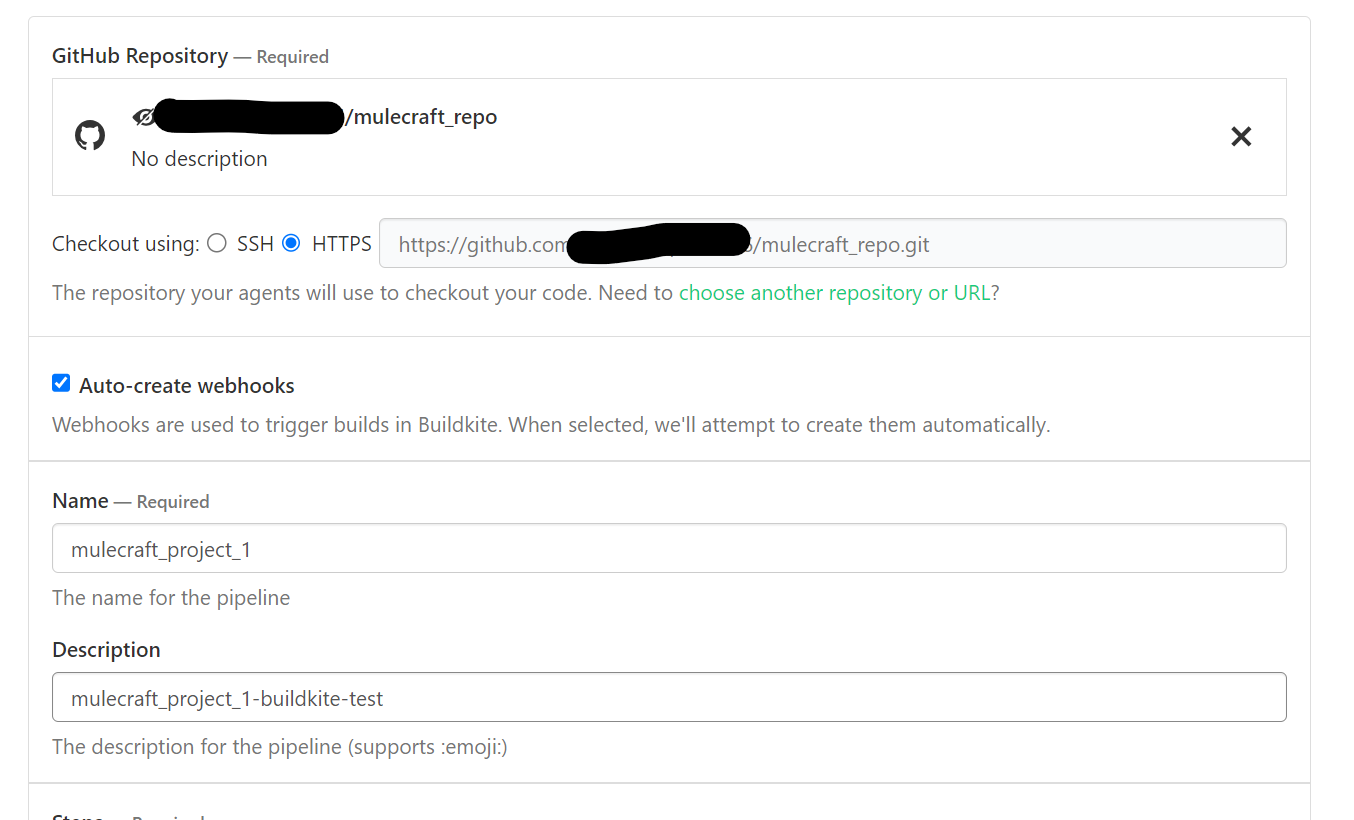
Let's create out first pipeline, provide valid details and enter to create a pipeline.
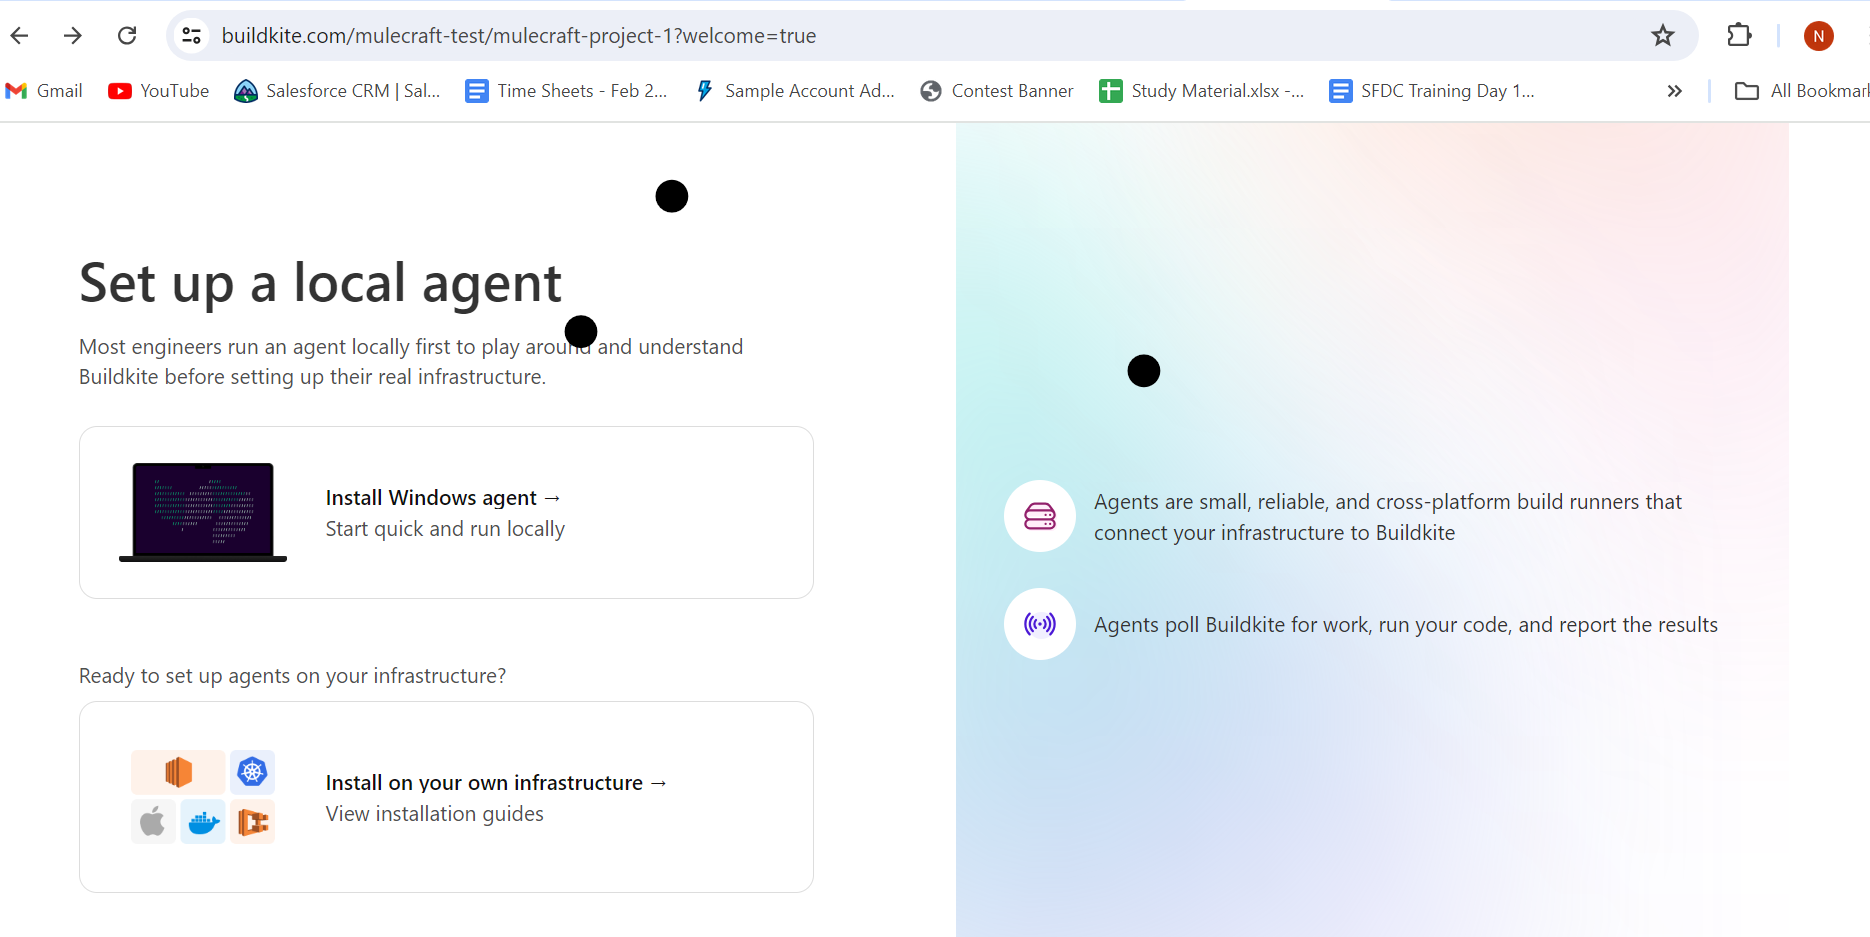
After creating a pipeline, let's set up a local agent.
Download the appropriate agent from this link. Link:https://github.com/buildkite/agent/releases
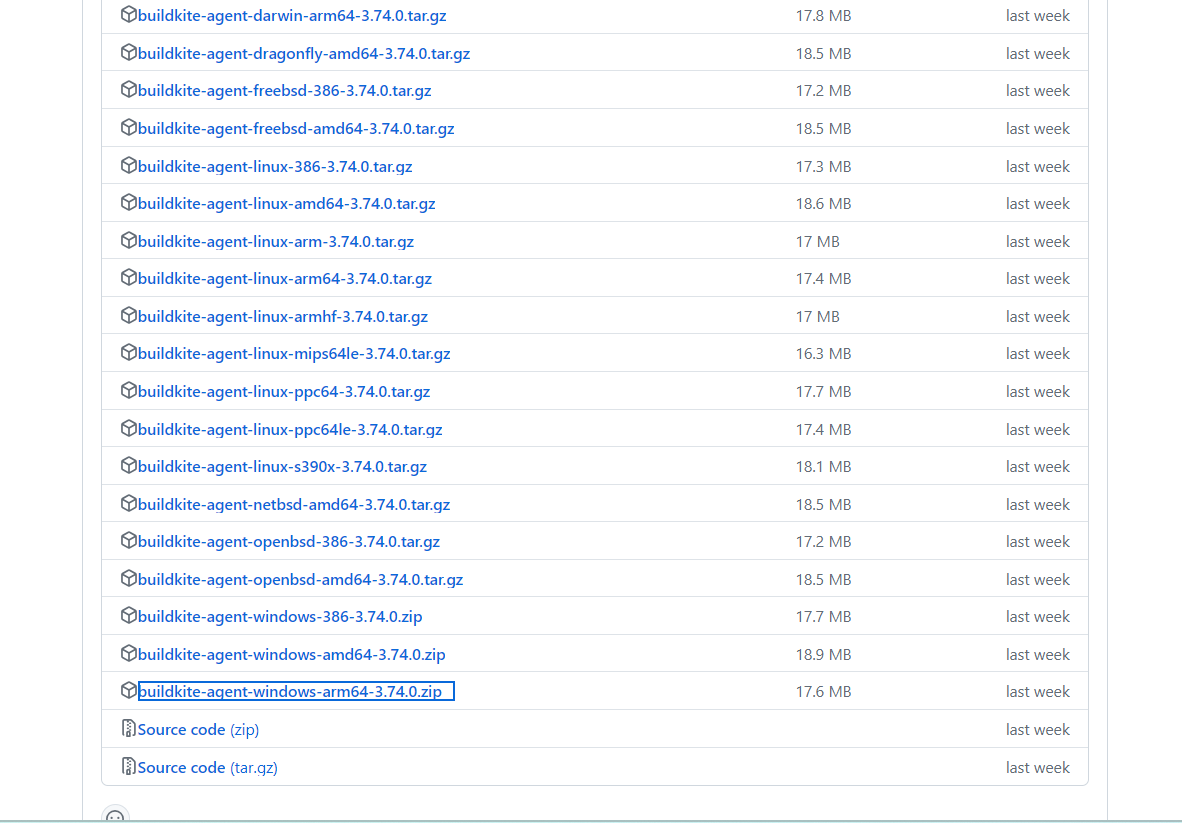
Extract the files to a directory.

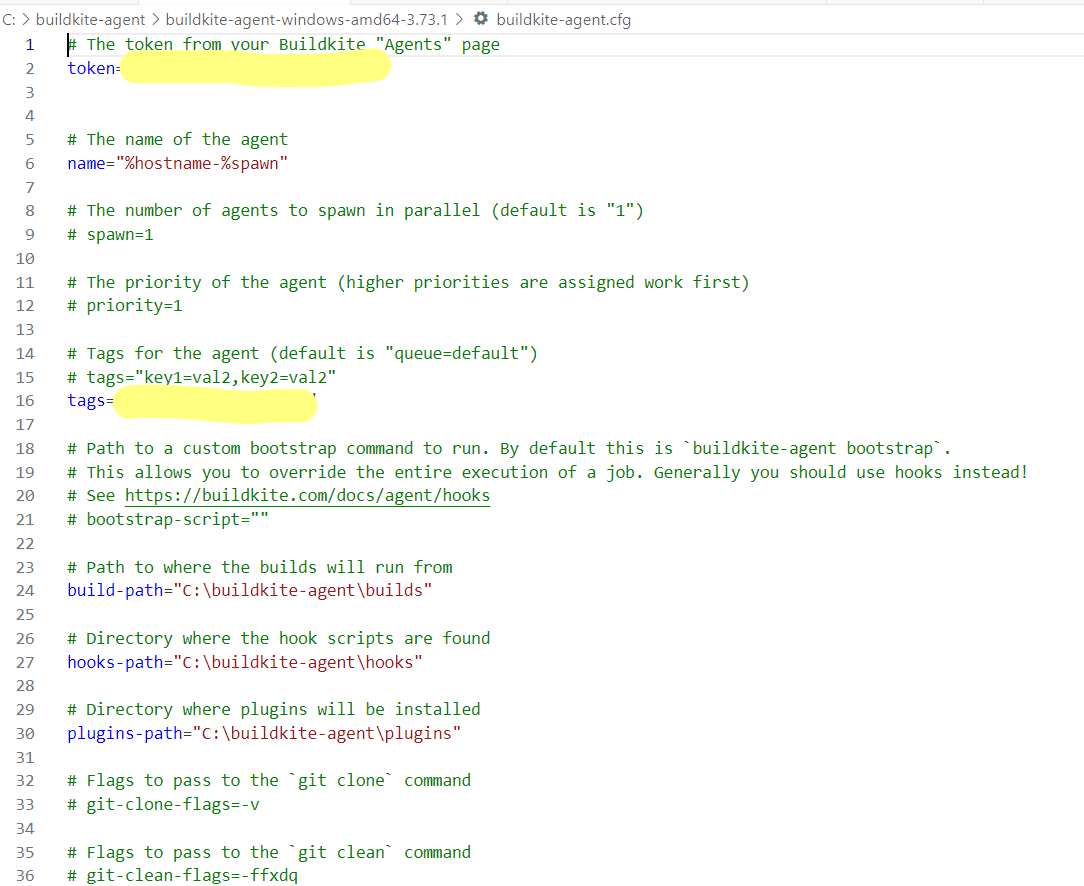
Copy the token and tag, replace it in the "buildkite-agent" configuration file.
Run buildkite-agent start from the command prompt.
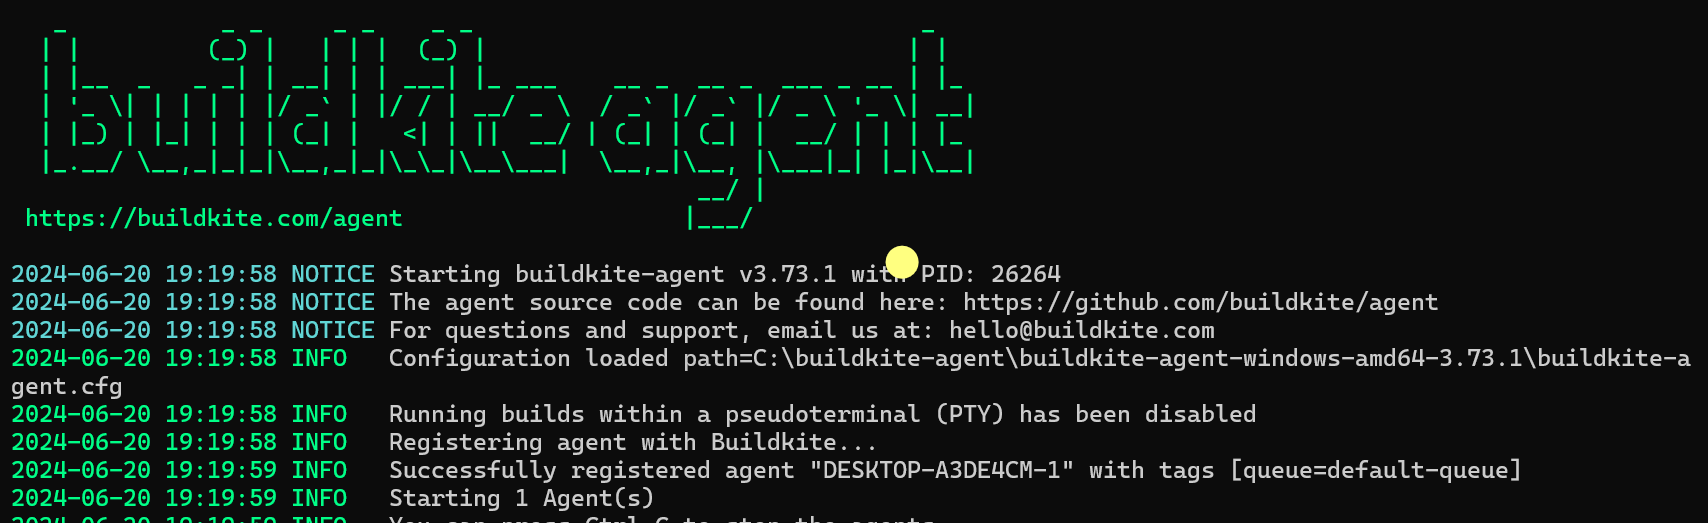
You have successfully set it up.
Conclusion
In this blog, we explored how to create a Buildkite account and set up a local agent for your CI/CD pipeline. We discussed the key features of Buildkite, including its scalability, integrations, and customization options. With these steps, you can begin automating your build and deployment processes effectively. In our next blog, we will dive into building a Mule application using Buildkite, providing insights and best practices for integrating MuleSoft into CI/CD workflow.